---
title: JavaScript Form Library | Getting Started Guide
description: A step-by-step tutorial on how to add SurveyJS Form Library to a JavaScript application, including jQuery.
---
# JavaScript Form Library
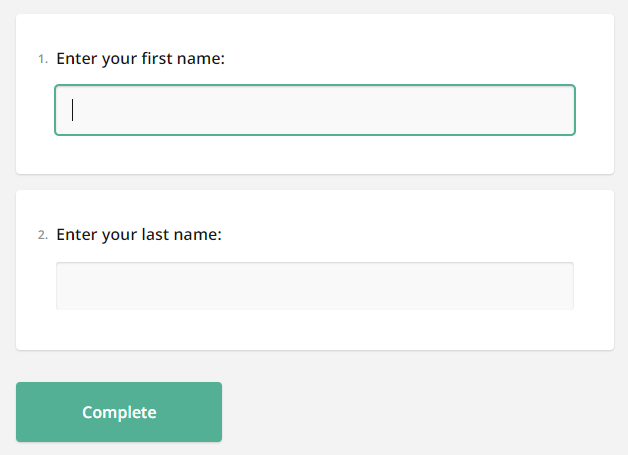
This step-by-step tutorial will guide you through the process of integrating the SurveyJS Form Library into any application built with HTML, CSS, and JavaScript (without frontend frameworks). By the end, you'll have created and displayed a fully functional survey as shown below:
View Live Example
[View Full Code on GitHub](https://github.com/surveyjs/code-examples/tree/main/get-started-library/html-css-js (linkStyle))
> SurveyJS Form Library offers dedicated integration packages for Angular, React, and Vue. If you are using one of these frameworks, please refer to the appropriate tutorial below:
> - [Get Started in Angular](https://surveyjs.io/form-library/documentation/get-started-angular)
> - [Get Started in Vue.js](https://surveyjs.io/form-library/documentation/get-started-vue)
> - [Get Started in React](https://surveyjs.io/form-library/documentation/get-started-react)
## Link SurveyJS Resources
SurveyJS Form Library is composed of two key parts: `survey-core` (platform-independent logic) and `survey-js-ui` (view models). Both are provided as script files, with `survey-core` also including a style sheet. To integrate these resources, insert the following links into the `` tag of your HTML page:
```html
```
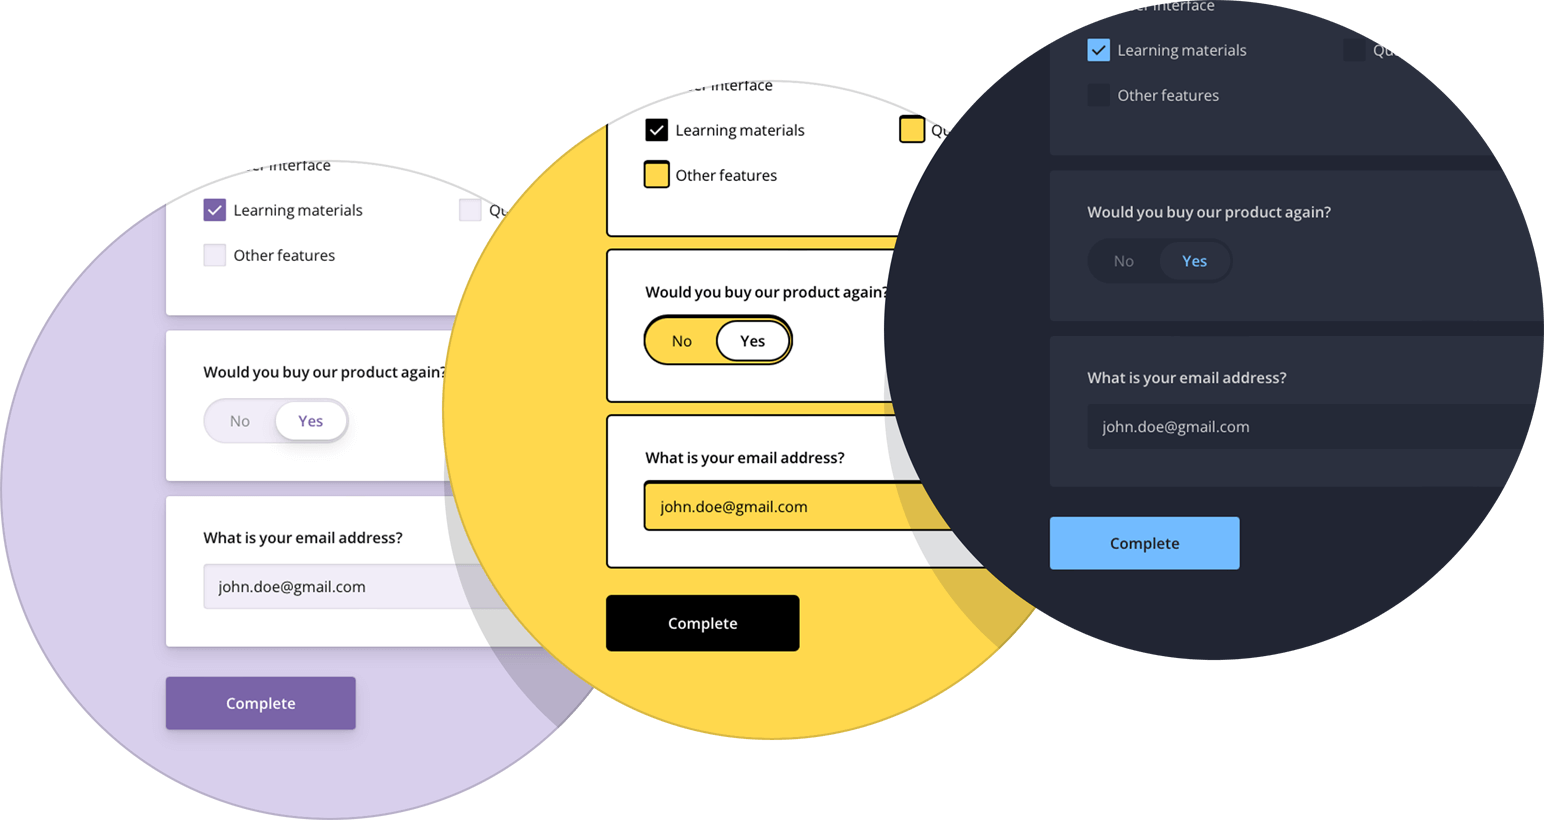
The style sheet above applies the Default theme. SurveyJS Form Library also includes several other predefined themes, which are illustrated below, along with a flexible theme customization mechanism based on CSS variables.
If you wish to apply a predefined theme other than Default or create your own custom theme, refer to the following help topic for detailed instructions:
[Themes & Styles](https://surveyjs.io/form-library/documentation/manage-default-themes-and-styles (linkStyle))
## Create a Model
A model defines the structure and content of your survey. The simplest survey model includes one or more questions without any layout modifications.
Models are defined using model schemas, which are represented as JSON objects. For example, the following model schema defines two [textual questions](https://surveyjs.io/Documentation/Library?id=questiontextmodel), each with a [title](https://surveyjs.io/Documentation/Library?id=questiontextmodel#title) and a [name](https://surveyjs.io/Documentation/Library?id=questiontextmodel#name). Titles are displayed on screen. Names are used to identify the questions in code.
```js
const surveyJson = {
elements: [{
name: "FirstName",
title: "Enter your first name:",
type: "text"
}, {
name: "LastName",
title: "Enter your last name:",
type: "text"
}]
};
```
To instantiate a model, pass the model schema to the [`Survey.Model`](https://surveyjs.io/form-library/documentation/api-reference/survey-data-model) constructor as shown in the code below. The model instance will be later used to render the survey.
```js
const survey = new Survey.Model(surveyJson);
```
View Full Code
```html
My First Survey
```
```js
const surveyJson = {
elements: [{
name: "FirstName",
title: "Enter your first name:",
type: "text"
}, {
name: "LastName",
title: "Enter your last name:",
type: "text"
}]
};
const survey = new Survey.Model(surveyJson);
```
## Render the Survey
A survey needs to be rendered within a page element, such as a `
`. Add this element to the `` tag of your page and be sure to specify its `id` attribute:
```html
```
Next, call the `render(container)` method on the model instance:
```js
const survey = new Survey.Model(surveyJson);
document.addEventListener("DOMContentLoaded", function() {
survey.render(document.getElementById("surveyContainer"));
});
```
If your application uses jQuery, you can render a survey using the `Survey()` jQuery plugin. Pass the model instance to the `model` property of the plugin configuration object.
```js
$(function() {
$("#surveyContainer").Survey({ model: survey });
});
```
As a result, you should see the following survey:
View Full Code
```html
My First Survey
```
```js
const surveyJson = {
elements: [{
name: "FirstName",
title: "Enter your first name:",
type: "text"
}, {
name: "LastName",
title: "Enter your last name:",
type: "text"
}]
};
const survey = new Survey.Model(surveyJson);
document.addEventListener("DOMContentLoaded", function() {
survey.render(document.getElementById("surveyContainer"));
});
```
## Handle Survey Completion
Once a respondent completes a survey, the results are accessible through the [`onComplete`](https://surveyjs.io/Documentation/Library?id=surveymodel#onComplete) event handler. In real-world applications, you should send these results to a server for storage in a database and further processing. If your application includes a user identification system, you can add the user ID to the survey results before sending them to the server:
```js
const SURVEY_ID = 1;
function surveyComplete (survey) {
const userId = /* ... Getting the user ID ... */
survey.setValue("userId", userId);
saveSurveyResults(
"https://your-web-service.com/" + SURVEY_ID,
survey.data
)
}
function saveSurveyResults(url, json) {
fetch(url, {
method: 'POST',
headers: {
'Content-Type': 'application/json;charset=UTF-8'
},
body: JSON.stringify(json)
})
.then(response => {
if (response.ok) {
// Handle success
} else {
// Handle error
}
})
.catch(error => {
// Handle error
});
}
const survey = new Survey.Model(surveyJson);
survey.onComplete.add(surveyComplete);
```
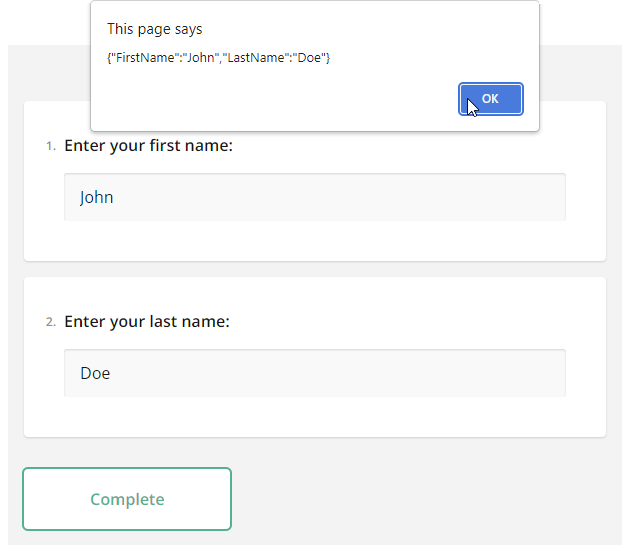
In this tutorial, the results are simply output in an alert dialog:
```js
function alertResults (sender) {
const results = JSON.stringify(sender.data);
alert(results);
}
const survey = new Survey.Model(surveyJson);
survey.onComplete.add(alertResults);
```
As you can see, survey results are saved in a JSON object. Its properties correspond to the `name` property values of your questions in the model schema.
View Full Code
```html
My First Survey
```
```js
const surveyJson = {
elements: [{
name: "FirstName",
title: "Enter your first name:",
type: "text"
}, {
name: "LastName",
title: "Enter your last name:",
type: "text"
}]
};
const survey = new Survey.Model(surveyJson);
function alertResults (sender) {
const results = JSON.stringify(sender.data);
alert(results);
}
survey.onComplete.add(alertResults);
document.addEventListener("DOMContentLoaded", function() {
survey.render(document.getElementById("surveyContainer"));
});
```
[View Full Code on GitHub](https://github.com/surveyjs/code-examples/tree/main/get-started-library/html-css-js (linkStyle))
## Further Reading
- [Create a Simple Survey](https://surveyjs.io/Documentation/Library?id=design-survey-create-a-simple-survey)
- [Create a Multi-Page Survey](https://surveyjs.io/Documentation/Library?id=design-survey-create-a-multi-page-survey)
- [Create a Quiz](https://surveyjs.io/Documentation/Library?id=design-survey-create-a-quiz)
 As you can see, survey results are saved in a JSON object. Its properties correspond to the `name` property values of your questions in the model schema.
 If you wish to apply a predefined theme other than Default or create your own custom theme, refer to the following help topic for detailed instructions:
[Themes & Styles](https://surveyjs.io/form-library/documentation/manage-default-themes-and-styles (linkStyle))
## Create a Model
A model defines the structure and content of your survey. The simplest survey model includes one or more questions without any layout modifications.
Models are defined using model schemas, which are represented as JSON objects. For example, the following model schema defines two [textual questions](https://surveyjs.io/Documentation/Library?id=questiontextmodel), each with a [title](https://surveyjs.io/Documentation/Library?id=questiontextmodel#title) and a [name](https://surveyjs.io/Documentation/Library?id=questiontextmodel#name). Titles are displayed on screen. Names are used to identify the questions in code.
```js
const surveyJson = {
elements: [{
name: "FirstName",
title: "Enter your first name:",
type: "text"
}, {
name: "LastName",
title: "Enter your last name:",
type: "text"
}]
};
```
To instantiate a model, pass the model schema to the [`Survey.Model`](https://surveyjs.io/form-library/documentation/api-reference/survey-data-model) constructor as shown in the code below. The model instance will be later used to render the survey.
```js
const survey = new Survey.Model(surveyJson);
```
If you wish to apply a predefined theme other than Default or create your own custom theme, refer to the following help topic for detailed instructions:
[Themes & Styles](https://surveyjs.io/form-library/documentation/manage-default-themes-and-styles (linkStyle))
## Create a Model
A model defines the structure and content of your survey. The simplest survey model includes one or more questions without any layout modifications.
Models are defined using model schemas, which are represented as JSON objects. For example, the following model schema defines two [textual questions](https://surveyjs.io/Documentation/Library?id=questiontextmodel), each with a [title](https://surveyjs.io/Documentation/Library?id=questiontextmodel#title) and a [name](https://surveyjs.io/Documentation/Library?id=questiontextmodel#name). Titles are displayed on screen. Names are used to identify the questions in code.
```js
const surveyJson = {
elements: [{
name: "FirstName",
title: "Enter your first name:",
type: "text"
}, {
name: "LastName",
title: "Enter your last name:",
type: "text"
}]
};
```
To instantiate a model, pass the model schema to the [`Survey.Model`](https://surveyjs.io/form-library/documentation/api-reference/survey-data-model) constructor as shown in the code below. The model instance will be later used to render the survey.
```js
const survey = new Survey.Model(surveyJson);
```