---
title: Vue Form Builder | Generate dynamic JSON forms in your Vue.js application
description: SurveyJS Form Builder for Vue is an open-source client-side component that fully integrates into your Vue application and generates form JSON definitions (schemas) behind the scenes. It offers a user-friendly drag-and-drop interface, GUI for form branching, and an integrated theme editor for customizing form design.
---
# Form Builder for Vue.js
[SurveyJS Vue Form Builder](https://surveyjs.io/create-free-survey) is an open-source UI component that seamlessly integrates with any backend system and allows you to create and style multiple dynamic HTML forms in any Vue application. This component generates form definitions (schemas) in real-time and offers a no-code drag-and-drop interface that makes form creation accessible to anyone. The form builder features a dedicated GUI for conditional rules and form branching and an integrated CSS theme editor for custom form styling and branding. This step-by-step tutorial will help you get started with the Form Builder component in a Vue 3 application. To add the component to your application, follow the steps below:
- [Install the `survey-creator-vue` npm Package](#install-the-survey-creator-vue-npm-package)
- [Configure Styles](#configure-styles)
- [Configure Survey Creator](#configure-survey-creator)
- [Render Survey Creator](#render-survey-creator)
- [Save and Load Survey Model Schemas](#save-and-load-survey-model-schemas)
- [Manage Image Uploads](#manage-image-uploads)
[View Full Code](https://github.com/surveyjs/code-examples/tree/main/get-started-creator/vue3 (linkStyle))
If you are looking for a quick-start application that includes all SurveyJS components, refer to the following GitHub repository: SurveyJS + Vue 3 Quickstart Template.
> In this guide, the terms "Form Builder" and "Survey Creator" are used interchangeably and both refer to the SurveyJS form building component for Vue.js.
## Install the Vue Form Builder npm Package
Survey Creator for Vue 3 consists of two npm packages: [`survey-creator-core`](https://www.npmjs.com/package/survey-creator-core) (platform-independent code) and [`survey-creator-vue`](https://www.npmjs.com/package/survey-creator-vue) (rendering code). Run the following command to install `survey-creator-vue`. The `survey-creator-core` package will be installed automatically as a dependency.
```cmd
npm install survey-creator-vue --save
```
## Configure Styles
Import Survey Creator and SurveyJS Form Library style sheets in the Vue 3 component that will render Survey Creator:
```html
```
## Configure Survey Creator
To configure the Survey Creator component, specify [its properties](https://surveyjs.io/survey-creator/documentation/api-reference/icreatoroptions) in a configuration object. In this tutorial, the object enables the following properties:
- [`autoSaveEnabled`](https://surveyjs.io/survey-creator/documentation/api-reference/icreatoroptions#autoSaveEnabled)
Automatically saves the survey JSON schema on every change.
- [`collapseOnDrag`](https://surveyjs.io/survey-creator/documentation/api-reference/icreatoroptions#collapseOnDrag)
Collapses pages on the design surface when users start dragging a survey element.
```html
```
Pass the configuration object to the `SurveyCreatorModel` constructor as shown in the code below to instantiate Survey Creator. Assign the produced instance to a constant that will be used later to render the component:
```html
```
View Full Code
```html
```
## Render Survey Creator
To render Survey Creator, add `SurveyCreatorComponent` to your template, and pass the model instance you created in the previous step to the component's `model` attribute:
```html
```
The code above registers `SurveyCreatorComponent` locally. If you want to register it globally, open the `main.ts` file, import `surveyPlugin` (for SurveyJS Form Library) and `surveyCreatorPlugin`, and install them using the `app.use()` method *in the exact order shown below*. In this case, you don't need to import `SurveyCreatorComponent` within each Vue component where you want to use it.
```js
// main.ts
import { createApp } from "vue";
import App from "./App.vue";
import { surveyPlugin } from "survey-vue3-ui";
import { surveyCreatorPlugin } from "survey-creator-vue";
createApp(App)
.use(surveyPlugin)
.use(surveyCreatorPlugin)
.mount("#app");
```
View Full Code
```html
```
## Activate a SurveyJS License
Survey Creator is not available for free commercial use. To integrate it into your application, you must purchase a [commercial license](https://surveyjs.io/licensing) for the software developer(s) who will be working with the Survey Creator APIs and implementing the integration. If you use Survey Creator without a license, an alert banner will appear at the bottom of the interface:
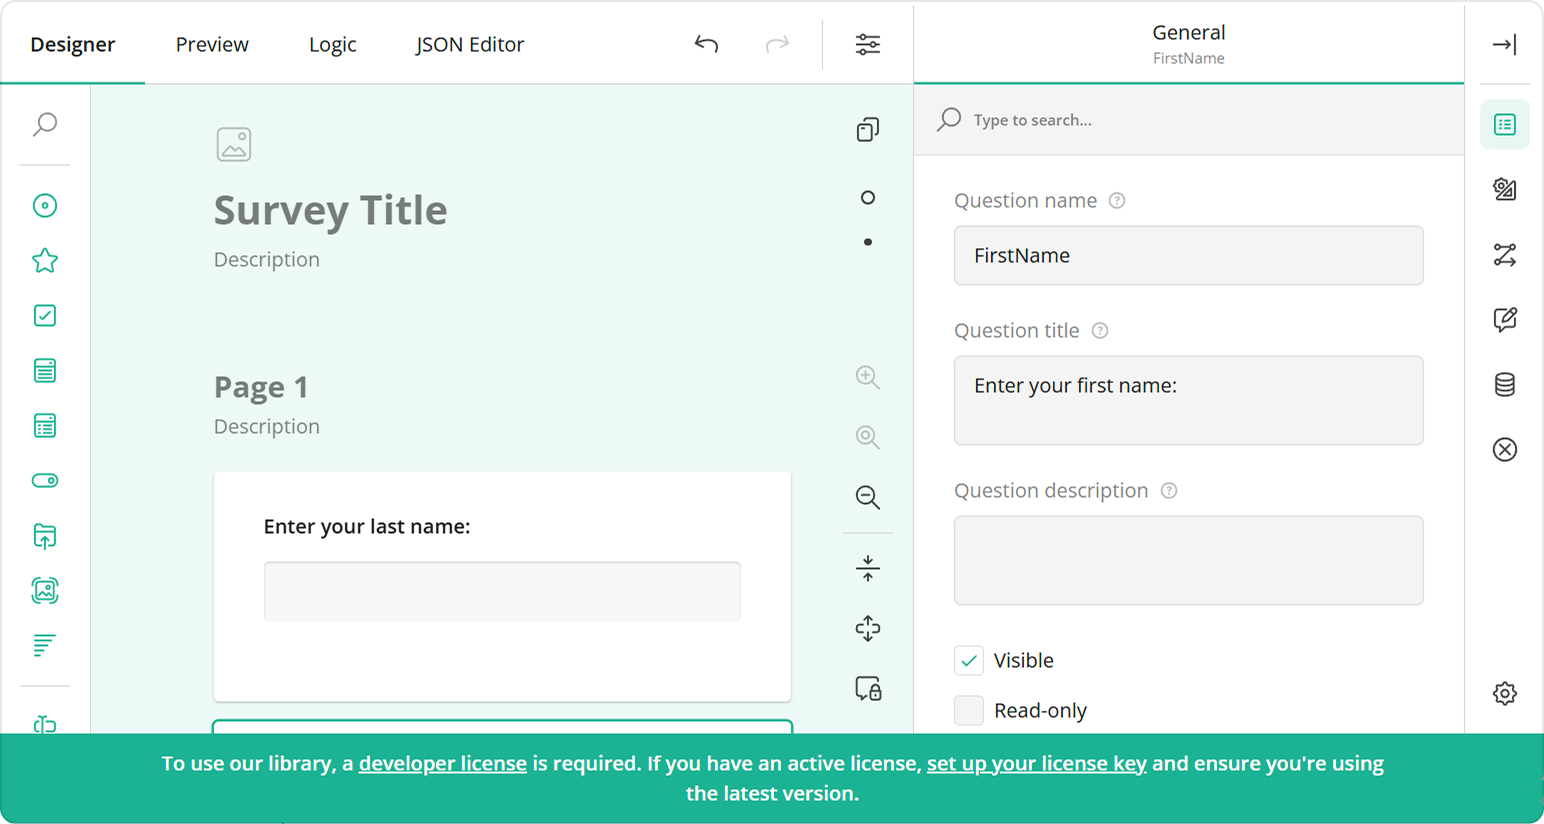 After purchasing a license, follow the steps below to activate it and remove the alert banner:
1. [Log in](https://surveyjs.io/login) to the SurveyJS website using your email address and password. If you've forgotten your password, [request a reset](https://surveyjs.io/reset-password) and check your inbox for the reset link.
2. Open the following page: [How to Remove the Alert Banner](https://surveyjs.io/remove-alert-banner). You can also access it by clicking **Set up your license key** in the alert banner itself.
3. Follow the instructions on that page.
Once you've completed the setup correctly, the alert banner will no longer appear.
## Save and Load Survey Model Schemas
Survey Creator produces survey model schemas as JSON objects. You can persist these objects on your server: save updates and restore previously saved schemas. To save a JSON object, implement the [`saveSurveyFunc`](/survey-creator/documentation/api-reference/survey-creator#saveSurveyFunc) function. It accepts two arguments:
- `saveNo`
An incremental number of the current change. Since web services are asynchronous, you cannot guarantee that the service receives the changes in the same order as the client sends them. For example, change #11 may arrive to the server faster than change #10. In your web service code, update the storage only if you receive changes with a higher `saveNo`.
- `callback`
A callback function. Call it and pass `saveNo` as the first argument. Set the second argument to `true` or `false` based on whether the server applied or rejected the change.
The following code shows how to use the `saveSurveyFunc` function to save a survey model schema in the browser's `localStorage` or in your web service:
```html
```
[View Demo](/survey-creator/examples/set-how-survey-configuration-changes-are-saved/ (linkStyle))
If you are running a NodeJS server, you can check a survey JSON schema before saving it. On the server, create a `SurveyModel` and call its [`toJSON()`](https://surveyjs.io/form-library/documentation/api-reference/survey-data-model#toJSON) method. This method deletes unknown properties and incorrect property values from the survey JSON schema:
```js
// Server-side code for a NodeJS backend
import { Model } from "survey-core";
const incorrectSurveyJson = { ... };
const survey = new Model(surveyJson);
const correctSurveyJson = survey.toJSON();
// ...
// Save `correctSurveyJson` in a database
// ...
```
To load a survey model schema into Survey Creator, assign the schema to Survey Creator's [`JSON`](https://surveyjs.io/survey-creator/documentation/api-reference/survey-creator#JSON) or [`text`](https://surveyjs.io/survey-creator/documentation/api-reference/survey-creator#text) property. Use `text` if the JSON object is converted to a string; otherwise, use `JSON`. The following code takes a survey model schema from the `localStorage`. If the schema is not found (for example, when Survey Creator is launched for the first time), a default JSON is used:
```html
```
After purchasing a license, follow the steps below to activate it and remove the alert banner:
1. [Log in](https://surveyjs.io/login) to the SurveyJS website using your email address and password. If you've forgotten your password, [request a reset](https://surveyjs.io/reset-password) and check your inbox for the reset link.
2. Open the following page: [How to Remove the Alert Banner](https://surveyjs.io/remove-alert-banner). You can also access it by clicking **Set up your license key** in the alert banner itself.
3. Follow the instructions on that page.
Once you've completed the setup correctly, the alert banner will no longer appear.
## Save and Load Survey Model Schemas
Survey Creator produces survey model schemas as JSON objects. You can persist these objects on your server: save updates and restore previously saved schemas. To save a JSON object, implement the [`saveSurveyFunc`](/survey-creator/documentation/api-reference/survey-creator#saveSurveyFunc) function. It accepts two arguments:
- `saveNo`
An incremental number of the current change. Since web services are asynchronous, you cannot guarantee that the service receives the changes in the same order as the client sends them. For example, change #11 may arrive to the server faster than change #10. In your web service code, update the storage only if you receive changes with a higher `saveNo`.
- `callback`
A callback function. Call it and pass `saveNo` as the first argument. Set the second argument to `true` or `false` based on whether the server applied or rejected the change.
The following code shows how to use the `saveSurveyFunc` function to save a survey model schema in the browser's `localStorage` or in your web service:
```html
```
[View Demo](/survey-creator/examples/set-how-survey-configuration-changes-are-saved/ (linkStyle))
If you are running a NodeJS server, you can check a survey JSON schema before saving it. On the server, create a `SurveyModel` and call its [`toJSON()`](https://surveyjs.io/form-library/documentation/api-reference/survey-data-model#toJSON) method. This method deletes unknown properties and incorrect property values from the survey JSON schema:
```js
// Server-side code for a NodeJS backend
import { Model } from "survey-core";
const incorrectSurveyJson = { ... };
const survey = new Model(surveyJson);
const correctSurveyJson = survey.toJSON();
// ...
// Save `correctSurveyJson` in a database
// ...
```
To load a survey model schema into Survey Creator, assign the schema to Survey Creator's [`JSON`](https://surveyjs.io/survey-creator/documentation/api-reference/survey-creator#JSON) or [`text`](https://surveyjs.io/survey-creator/documentation/api-reference/survey-creator#text) property. Use `text` if the JSON object is converted to a string; otherwise, use `JSON`. The following code takes a survey model schema from the `localStorage`. If the schema is not found (for example, when Survey Creator is launched for the first time), a default JSON is used:
```html
```
View Full Code
```html
```
## Manage Image Uploads
When survey authors design a form or questionnaire, they can add images to use as a survey [logo](https://surveyjs.io/form-library/documentation/api-reference/survey-data-model#logo) or [background](https://surveyjs.io/form-library/documentation/api-reference/survey-data-model#backgroundImage), in the survey header, or within [Image](https://surveyjs.io/form-library/examples/add-image-and-video-to-survey/) and [Image Picker](https://surveyjs.io/form-library/examples/image-picker-question/) questions. Those images are embedded in the survey and theme JSON schemas as Base64 URLs. However, this technique increases the schema size. To avoid this, you can upload images to a server and save only image links in the JSON schemas.
To implement image upload, handle the [`onUploadFile`](https://surveyjs.io/survey-creator/documentation/api-reference/survey-creator#onUploadFile) event. Its `options.files` parameter stores the images you should send to your server. Once the server responds with an image link, call the `options.callback(status, imageLink)` method. Pass `"success"` as the `status` parameter and a link to the uploaded image as the `imageLink` parameter.
```html
```
[View Demo](https://surveyjs.io/survey-creator/examples/file-upload/vue3js (linkStyle))
To view the application, run `npm run dev` in a command line and open [http://localhost:5173/](http://localhost:5173/) in your browser.
View Full Code
```html
```
[View Full Code on GitHub](https://github.com/surveyjs/code-examples/tree/main/get-started-creator/vue3 (linkStyle))
## (Optional) Enable Ace Editor in the JSON Editor Tab
The JSON Editor tab enables users to edit survey JSON schemas as text. To make the editing process more convenient, you can integrate the Ace code editor. Install the `ace-builds` package to add Ace to your project:
```sh
npm install ace-builds --save
```
Import Ace and required extensions in a Vue component that renders Survey Creator. For instance, the following code imports the extensions that enable the Find/Replace dialog in Ace and add support for the dark theme:
```html
```
To enable code highlighting, set the path to the directory containing the `ace.js` script using the `AceJsonEditorModel.aceBasePath` property. If you host `ace.js` on your server, specify your server path. If you use a CDN or installed Ace via npm, you can use the following path:
```html
```
[View Demo](/survey-creator/examples/ace-editor-integration/vue3js (linkStyle))
[View Full Code on GitHub](https://github.com/surveyjs/code-examples/tree/main/get-started-creator/vue3 (linkStyle))
## Further Reading
- [Localization](https://surveyjs.io/Documentation/Survey-Creator?id=localization)
- [Property Grid Customization](https://surveyjs.io/Documentation/Survey-Creator?id=property-grid)
- [Toolbox Customization](https://surveyjs.io/Documentation/Survey-Creator?id=toolbox)
- [Survey Customization](https://surveyjs.io/Documentation/Survey-Creator?id=survey-customization)