Understanding Text Piping in SurveyJS Forms: A-Z Guide
Text Piping is a dynamic feature that increases user engagement and personalization by including previously entered or selected text into subsequent questions, answer options, and even the confirmation message on the Thank You page. In this blog post, we are going to explore various data sources that can be used for generating piped text and demonstrate how easy it is to set up text piping within your SurveyJS forms.
What's Text Piping?
Text piping, also known as piped text, is a built-in functionality within SurveyJS Creator that enables survey makers to set up the transfer of information entered by respondents into subsequent survey elements, such as questions, choice options, dynamic titles, custom text on the Thank You page, etc. It's a useful and easy way to personalize the survey-taking experience and make user input become part of their ongoing interaction.
Before You Start
Even though setting up piped text in SurveyJS Creator is incredibly straightforward, there are a few essential settings in the Property Grid that one needs to be familiar with in order to generate piped text.
name
A question and panel ID that is not visible to respondents and is used in various configurations, including text piping.title
A user-friendly name of a question or panel that your respondents will see.value
An ID for individual choice options, items, rows and columns. The same way asname, it's not visible and is used in various configurations only. Please refer to the Shared and Unique IDs section of the previous blog post to learn more about other identifiers that can be used within SurveyJS forms.calculatedValues
Custom variables that serve as intermediate or auxiliary variables used in form calculations. They take respondent inputs as source values. Each custom variable has a unique name and an expression it's based on.isAllRowRequired
When selected, this setting makes an answer for each row of a Single-Select Matrix required.
In order to access entered or selected input and pass it to another survey element, the ID of a source survey element has to be referenced to the target element in curly brackets. This way, a respondent's previous input gets automatically inserted into the dynamic survey element you are targeting. Here is a brief summary of how to generate piped text:
- Decide on a source survey element from which you want to pipe entered text (a question or row value, a choice option, etc.) and copy its ID (
name). - Identify a target survey element (a choice option, a question or panel title, custom text on the Thank You page, etc.).
- Reference the source element's ID within the target survey element using curly brackets:
{source-element-name}. - (Optional) Make sure your source element is required. If you choose not to make it required, create a custom variable that will display some static text when the source element doesn't have a value. For example, if a user skips a "First name" question, you can address them as "customer" or "guest", which will be replaced by a user's name once they answer the "First name" question.
Pipe Text into Questions
Imagine a survey where each subsequent question builds upon the respondent's previous answers. Text piping enables this fluidity by embedding the respondent's earlier input directly into subsequent questions.
Pipe Text from Question Values
If a respondent indicates their preference for a particular product, text piping can dynamically insert that product's name into the titles of the follow-up questions about specific features or benefits desired. In the example below, we are piping a user response from the question with an ID "cuisine-type" to generate a dynamic title for the next question.
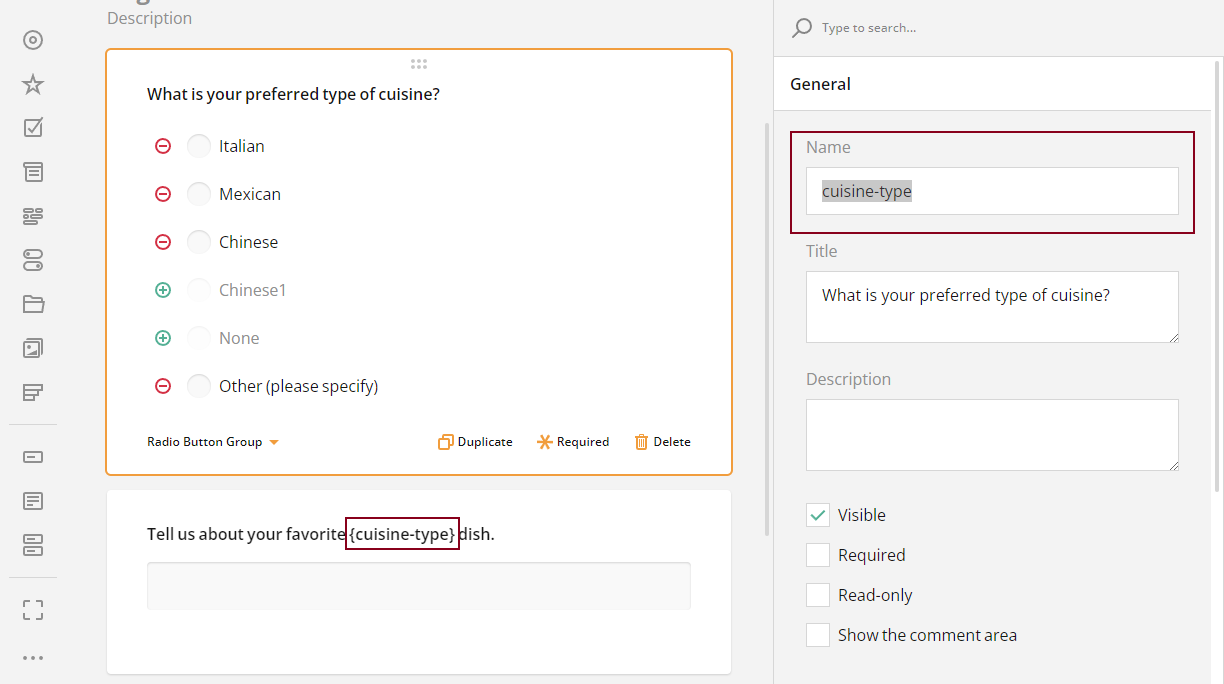
This way, when a user selects their preferred type of cuisine, the text of the selected option will appear in the indicated place within the title of the follow-up question.
Pipe Text from Row Values
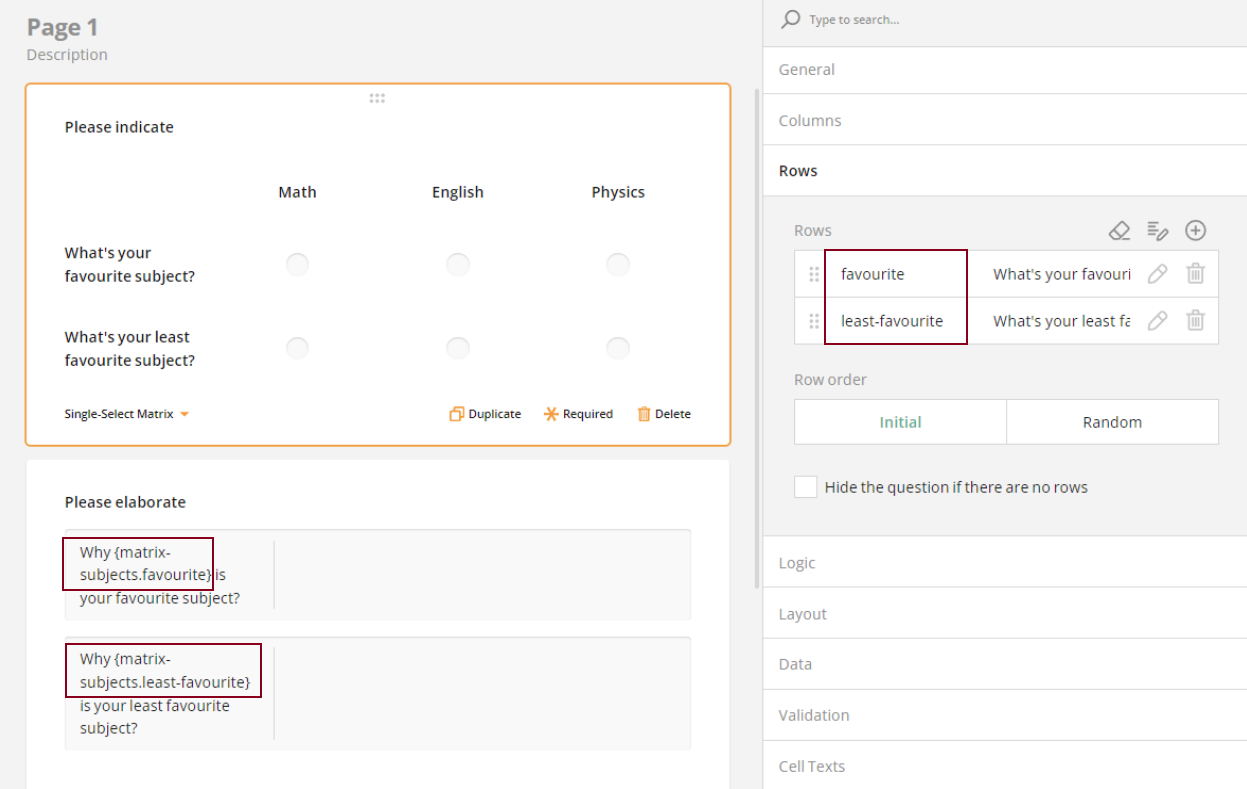
In case you want to source text from one of the question elements (when a question type has several inputs), a question element ID (value) is used instead of a question ID (name). In the example below, the source elements are row IDs of a Single-Select Matrix. The selected row values are then added to the dynamic item titles of a follow-up question. To implement this logic, follow the instructions below:
Open our All-in-One Demo.
Drop a Single-Select Matrix onto your form and configure it as follows:
- Set the following Title:
"Please indicate". - Assign
"matrix-subject"to the Name property (serves as an ID). - Make an answer in each matrix row required by ticking the "Require answer for all rows" property under Validation.
- Assign the following row values (IDs):
"favourite"for the first row and"least-favourite"for the second row. - Add the following display texts for the rows:
"What's your favourite subject?"for the first row and"What's your least favourite subject?"for the second row. - Add column headers:
"Math","English","Physics".
- Set the following Title:
Drop a Multiple Textboxes question onto your form and configure it as follows:
- Set the Title as follows:
"Please elaborate". - Add dynamic item titles by referencing a matrix row ID from which you wish to source an answer value. Since each matrix row is a component of the matrix question, it's important to reference the matrix ID first, followed by the row ID:
{matrix-subject.favourite}.
- Set the Title as follows:
Expand the Logic category and add a conditional visibility rule using the magic wand or simply paste the following expression in the input field of the "Visible if" property:
{matrix-subjects.favourite} notempty and {matrix-subjects.least-favourite} notempty. This way, the second question will only become visible when a respondent answers questions from both matrix rows.
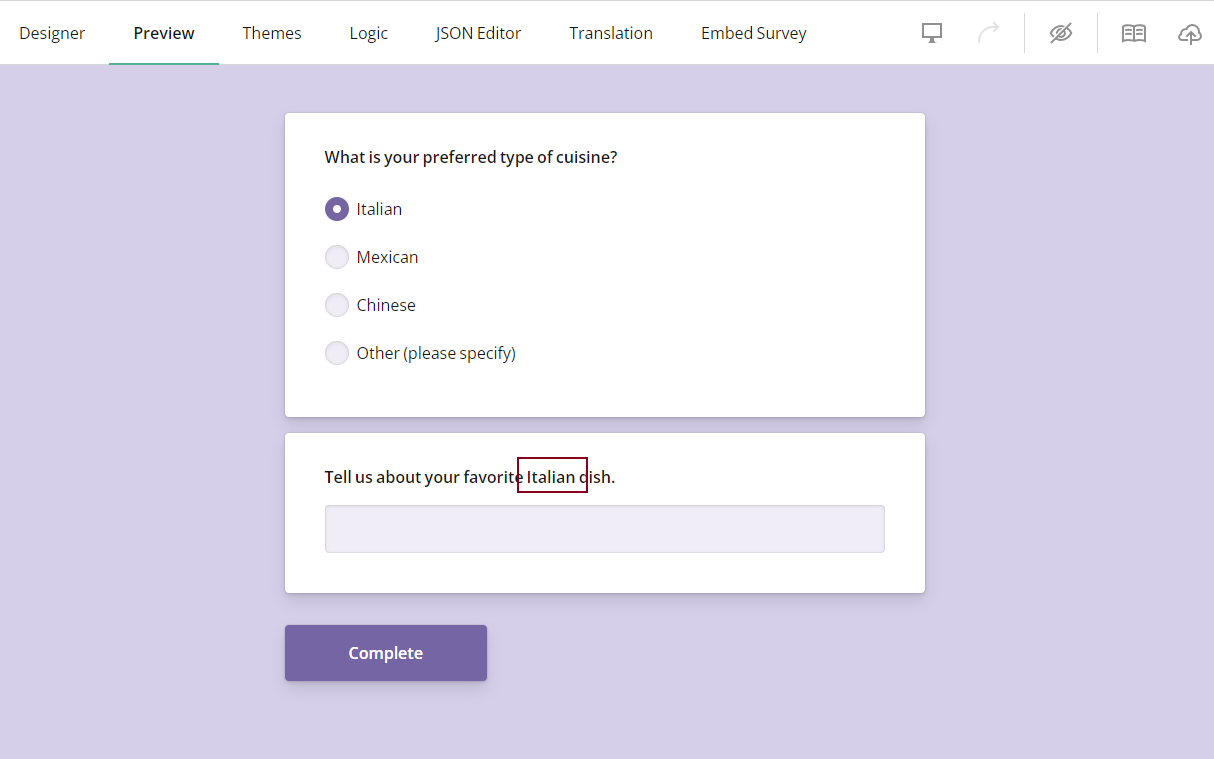
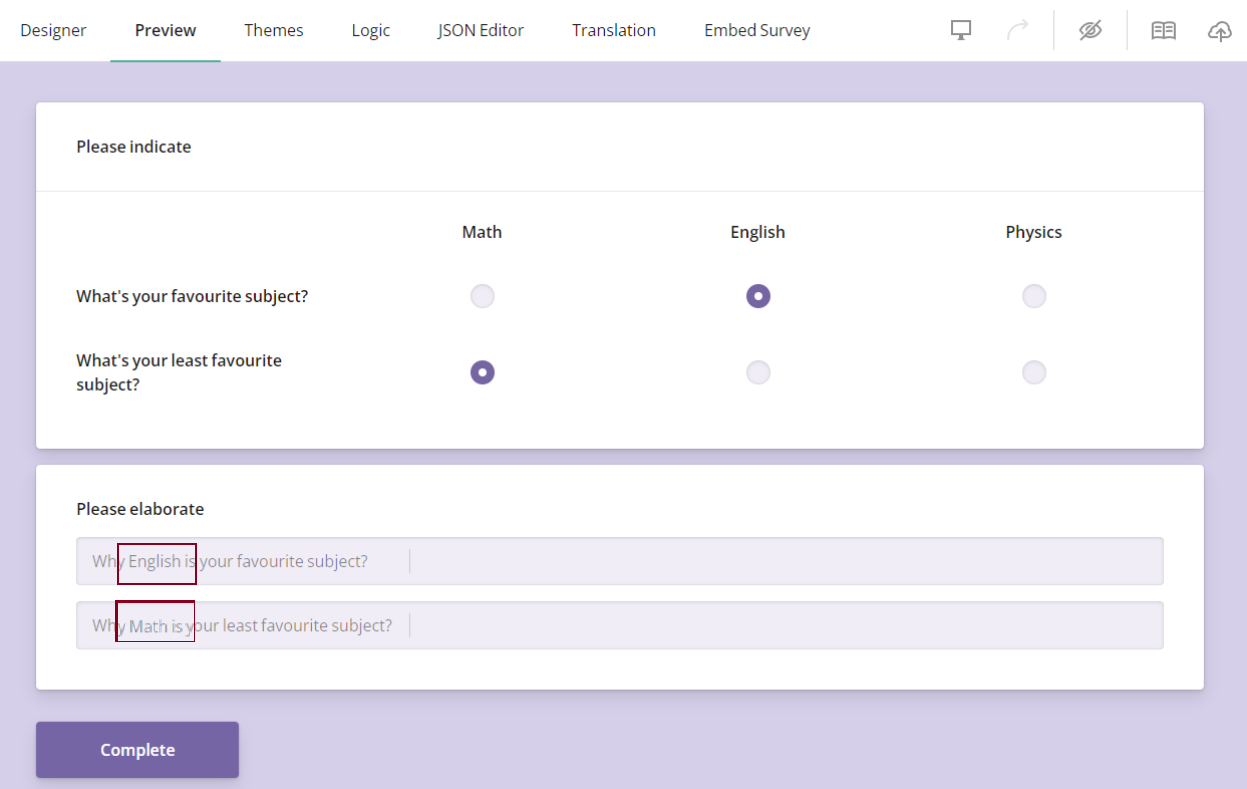
Now let's see how the form looks in the Preview tab:
Pipe Text from Item Values
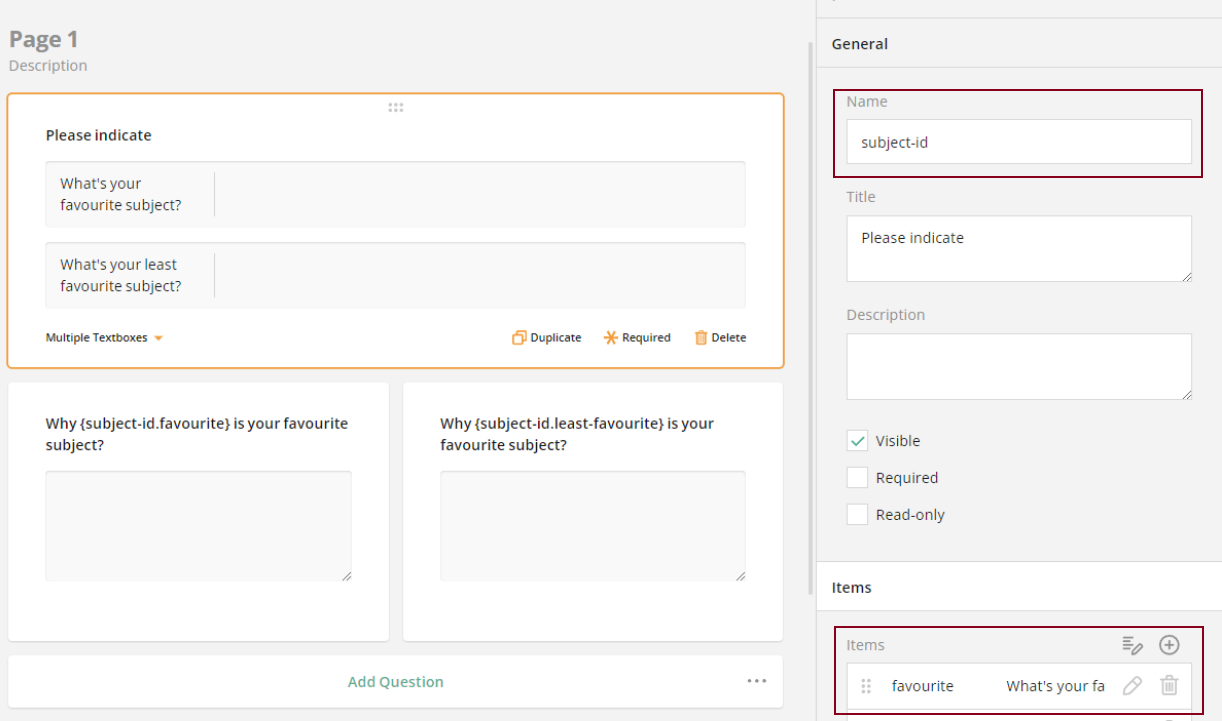
You can utilize responses from individual question items to inject these values into the dynamic titles of subsequent questions. For instance, the following example shows how to extract answers from Multiple Textboxes items and incorporate them into the titles of two Long Text questions.
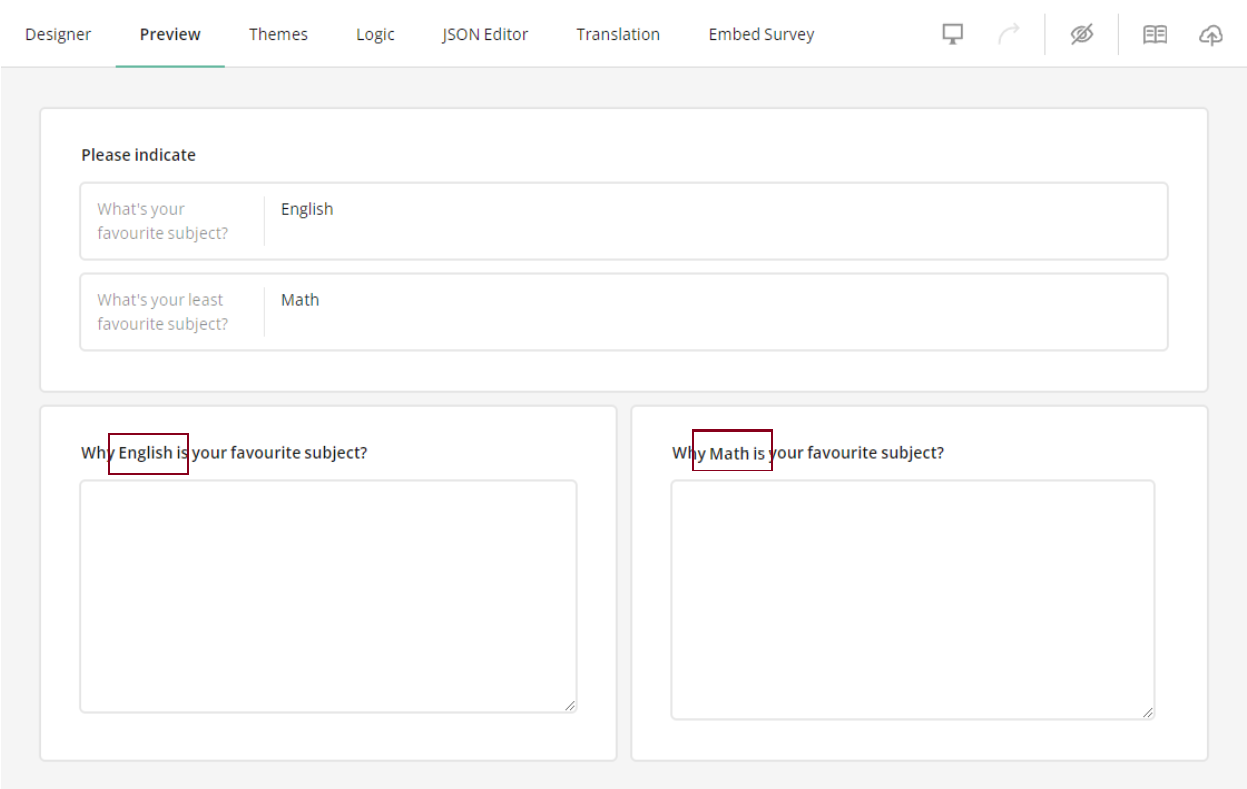
Technically, we access the value item properties of the Multiple Textboxes question by appending a path to them (the question ID in this example): {subject-id.favourite}. Here, subject-id is the value (ID) of the Name property of the source question, while favourite represents the value (ID) of an item. This syntax indicates our intention to retrieve the item value from this particular question.
Pipe Text into Choice Options
Text piping isn't limited to questions alone. It also extends to answer choices. By piping text into answer options, survey designers can offer custom selections that align with respondents' previous inputs. This customization increases a sense of relevance and understanding, leading to more accurate and thoughtful responses. Click the link below to try out a free demo illustrating how to add piped text into choice options of a multi-select question.
Pipe Text into the Thank You Page
In addition to questions and answers, text piping can be used to personalize the Thank You page or confirmation message that respondents see upon survey completion. In these cases, piped text provides a personalized touch by acknowledging respondents' contributions and reflecting their input. For example, you can use user response from "What's your first name?" question to address them by this name later in a custom message or provide further recommendations based on their input.
To create a personal message on the Thank You page, follow the instructions below:
- Make the "First name" question in your form required.
- Assign
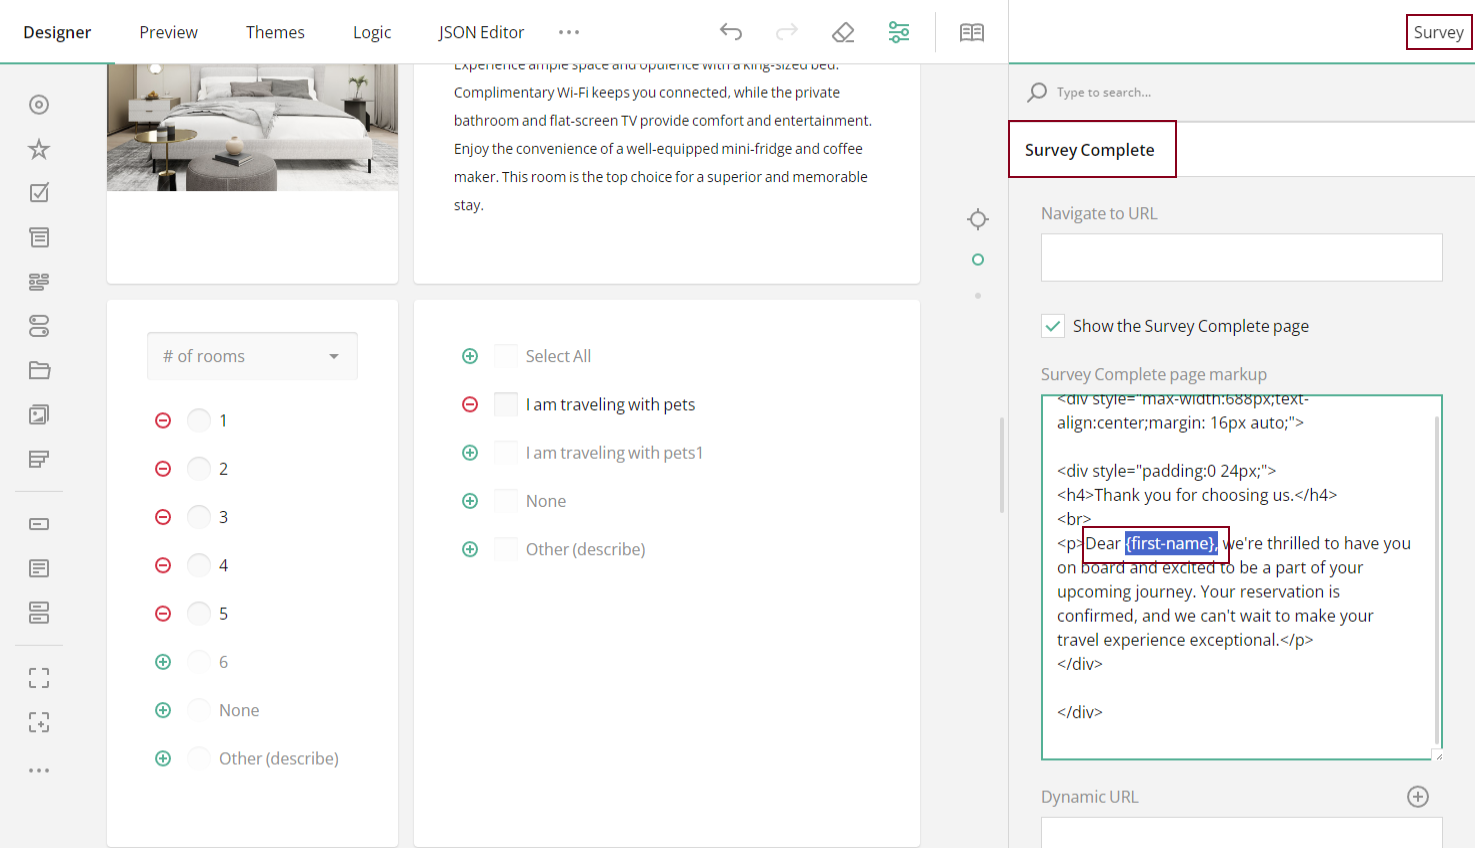
"first-name"as a value for the Name property of the "First name" question. - Switch to the survey-level settings (in the top right corner of the Property Grid).
- Under "Survey Complete", find an input field called "Survey Complete page markup".
- Update the default "Thank you for completing the survey" message using basic markup syntax.
- Address your respondents by their name by adding "Dear
{first-name}" at the beginning of the message.
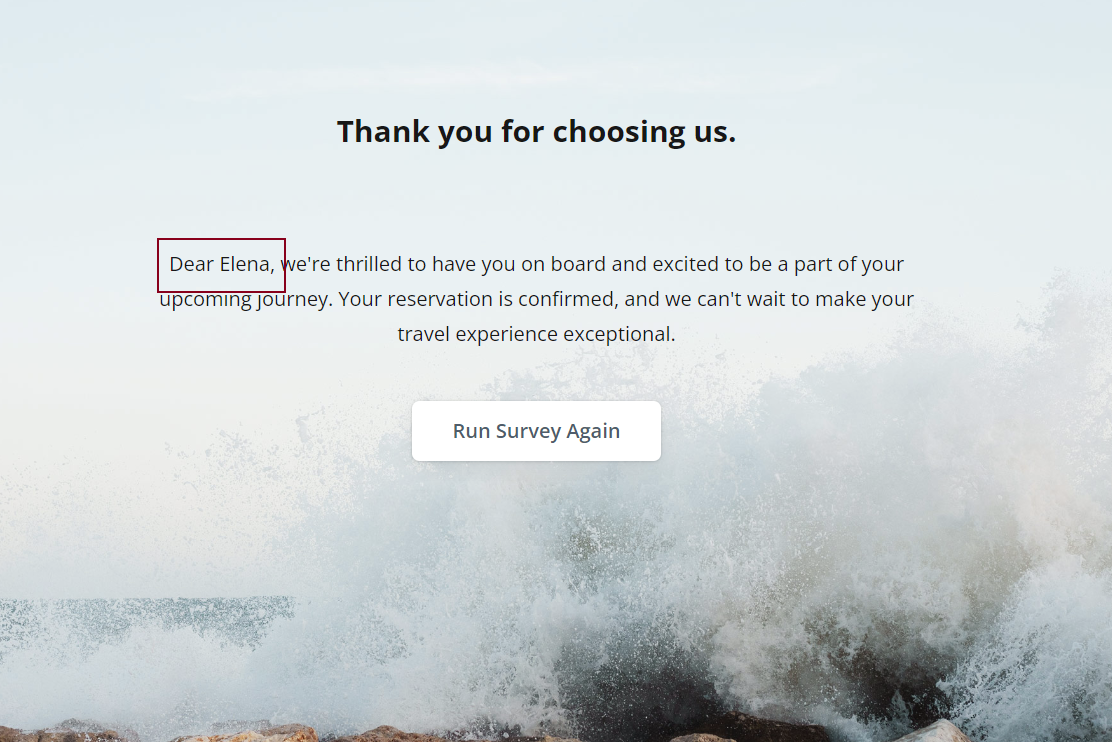
Upon survey completion, respondents will see their name on the Thank You page, as shown in the image below:
Conclusion
Text piping in a form or survey isn't merely a technical feature; it's a powerful tool that allows you to provide a more personalized experience for respondents. By piping previously entered data throughout the form, you can create a sense of connection and relevance, ultimately enhancing user engagement and satisfaction.
Try out our free demos below or create your own form with Piped Text by following the links below: