How to Build a Multi-Level Dynamic Form with Nested Repeat Groups in SurveyJS
When creating advanced forms, you may need to repeat a set of fields inside another repeating set of fields. This is often referred to as a nested repeat group, repeat group within another repeat group, or simply a nested loop. These structures are especially useful when you're working with data that has a hierarchical structure, such as teams within departments, students within classes, or tasks within projects.
Here is an example of a dynamic form structure with nested repeat groups:
- Project 1
- Task 1.1
- Task 1.2
- Project 2
- Task 2.1
- Task 2.2
- Task 2.3
As you can see, a nested repeat group consists of:
- An outer loop (outer repeat group), which repeats based on one criterion.
- An inner loop (inner repeat group), which repeats within each instance of the outer loop.
For example, if you're collecting a departmental employee list, the outer loop represents departments, while the inner loop represents employees within each department.
Watch Video
In Survey Creator, the outer loop can be implemented using a Dynamic Panel, the inner loop can be configured using another Dynamic Panel or a Dynamic Matrix. In this guide, we'll show you how to build a form with nested dynamic panels to capture a departmental employee structure of a company using a nested loop.
Step 1: Create the Outer Repeat Group
The outer loop represents departments and is built upon a Dynamic Panel. Each panel entry displays a Single-Line Input field that collects the department name. The entry's title is dynamically constructed using an Entry title pattern that includes a dynamic value sourced from the department name input and a static value—the word "department".
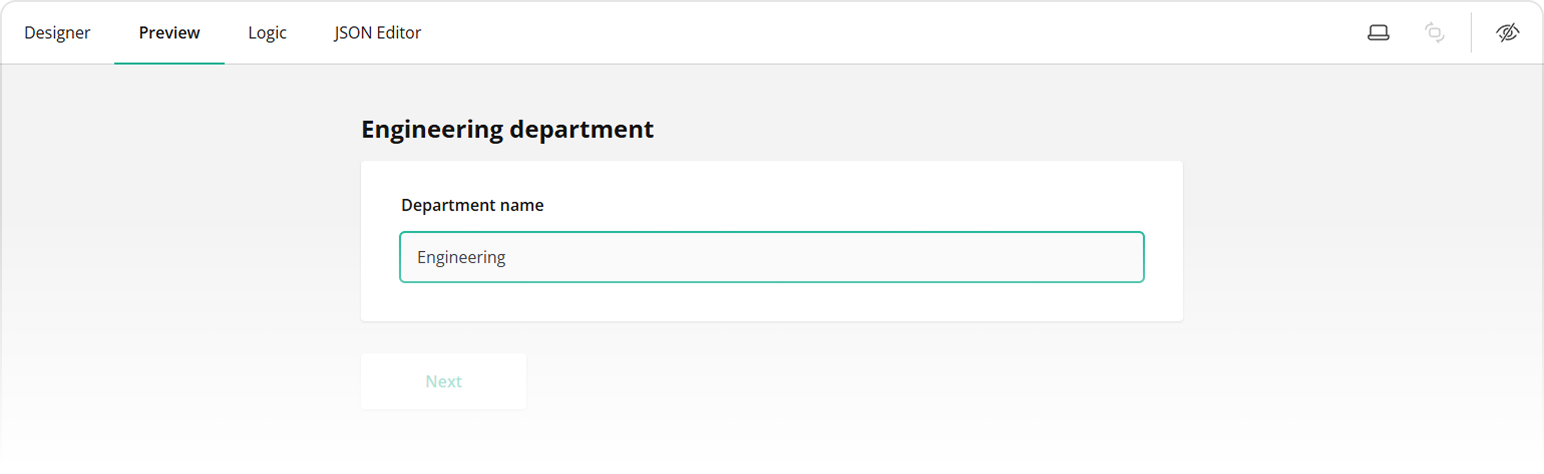
Before a user enters a department name, the placeholder text [not set] will be displayed in the entry title, resulting in the following title: [not set] department.

After a user types a department name (e.g., "Engineering"), the panel entry title automatically updates to: Engineering department.
To create an outer repeat group, follow the steps below:
Add a Dynamic Panel to your form.
Assign it a user-friendly title and a panel name (ID) using the Panel title and Panel name properties.
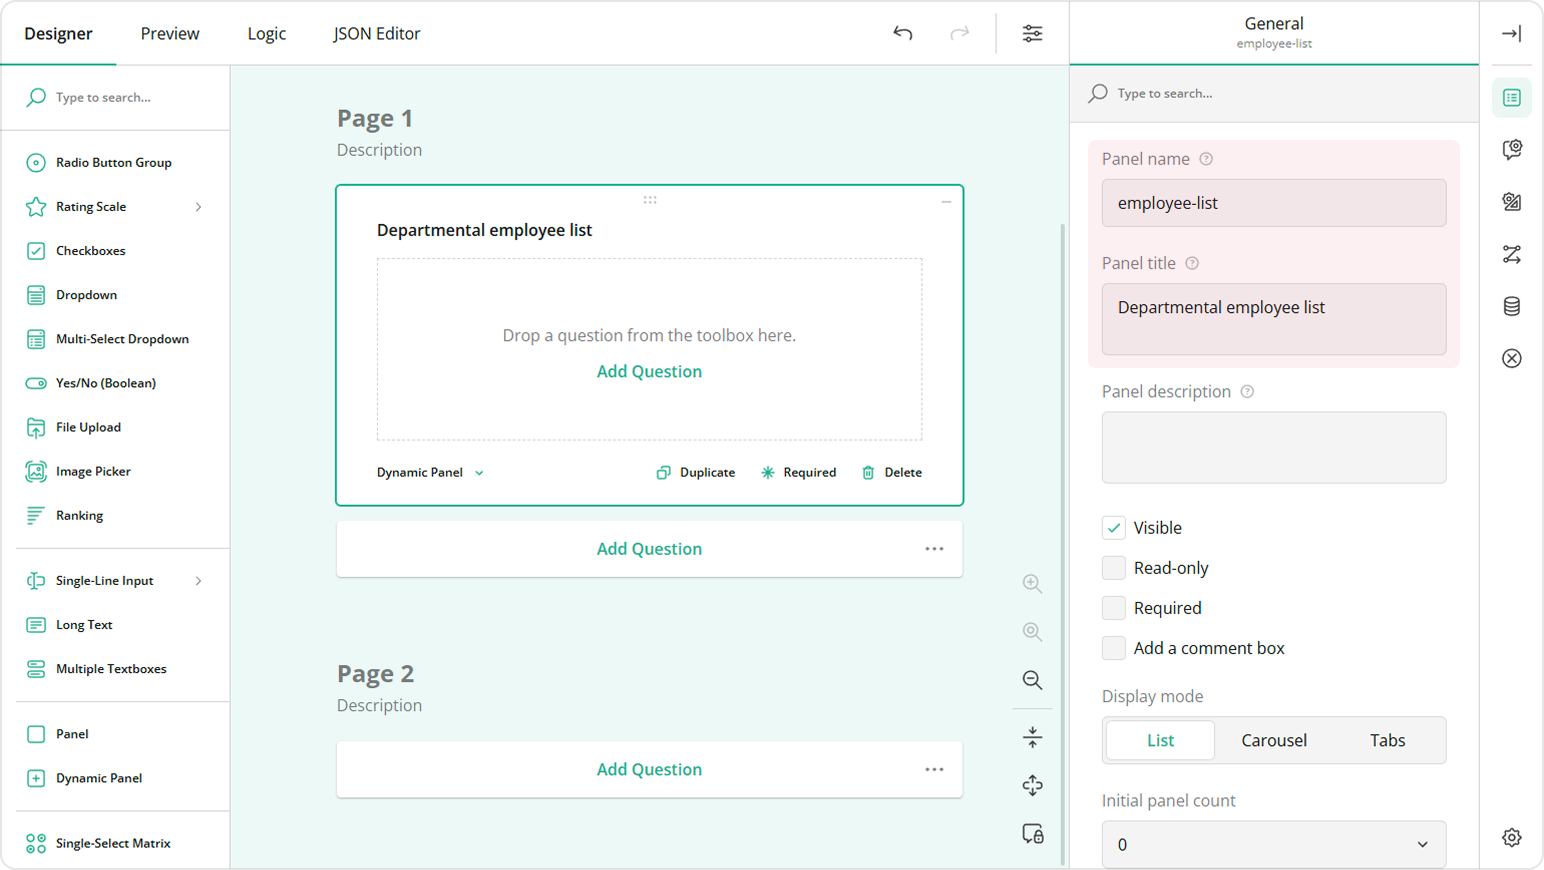
Inside the Dynamic Panel, add a Single-Line Input for entering department names. Title it "Department name" and assign it the question ID
department-name.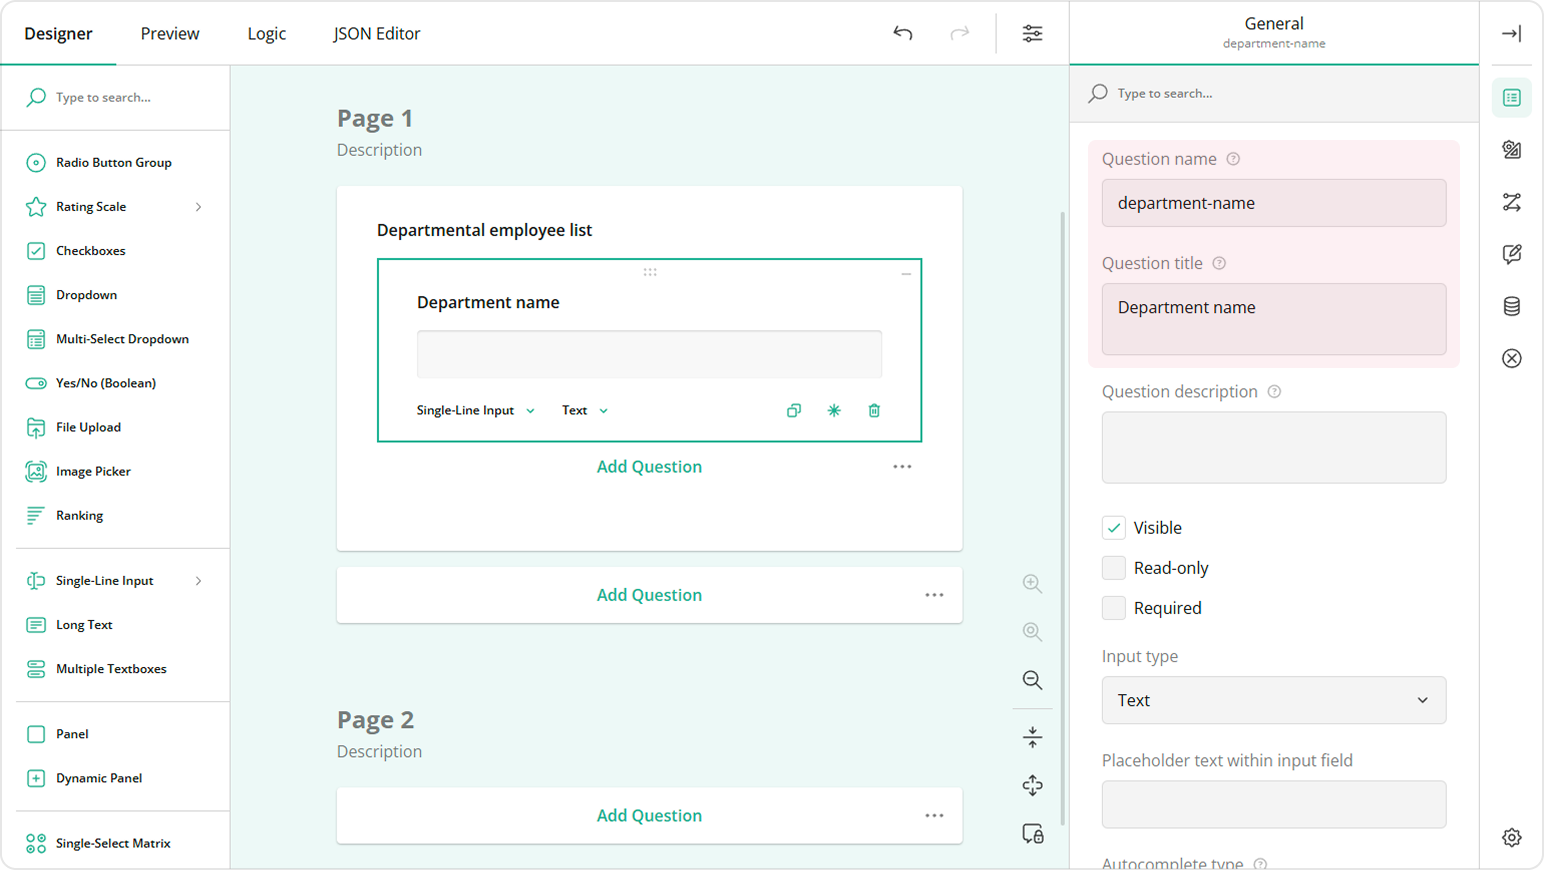
Select the Dynamic Panel and under the General category locate the Entry title pattern property.
Set the property to
{panel.department-name} department, wherepanelis a keyword for accessing a question within the same entry,department-nameis an ID of the source question, anddepartmentis simply a static value.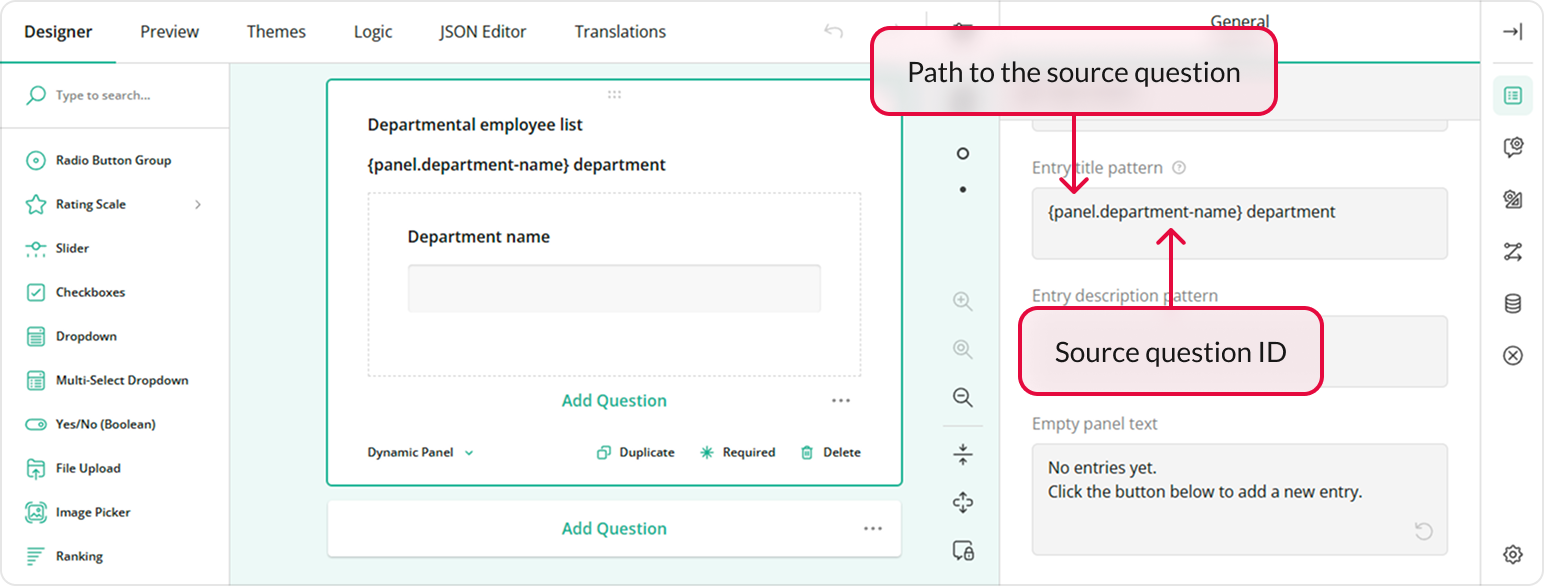
Select the Department name question.
Under the Data category, locate the Default display value for dynamic texts property.
Enter
[not set]or any other value you wish to display in the dynamic title before the source question receives a value.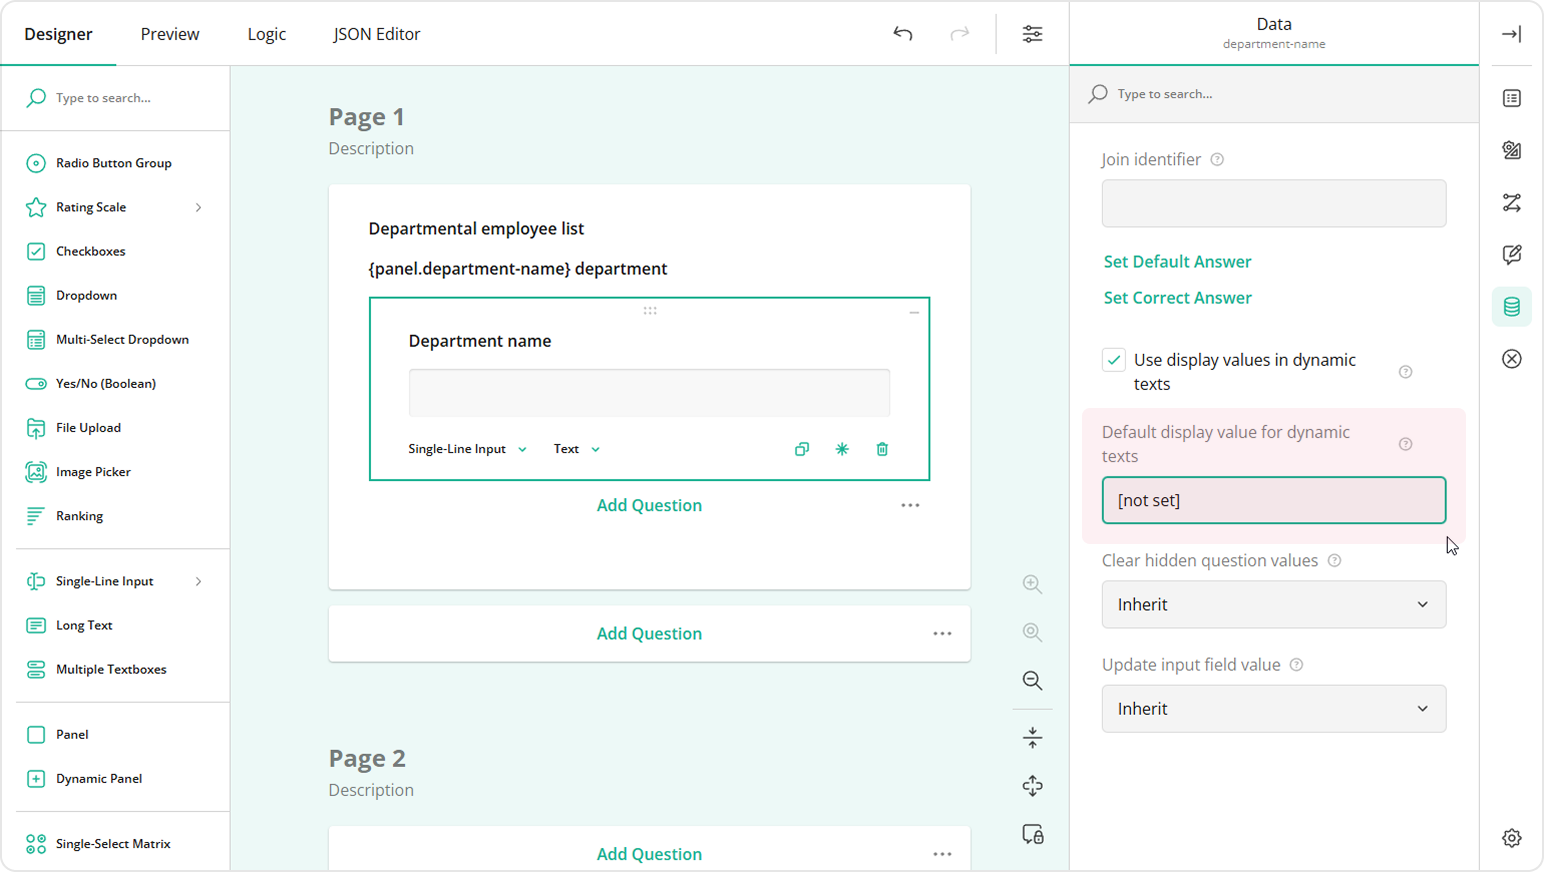
This setup will display panel entry titles like so:
- Before input:
[not set] department. - After a user types a department name (e.g., "Engineering"):
Engineering department.
Step 2: Create the Inner Repeat Group
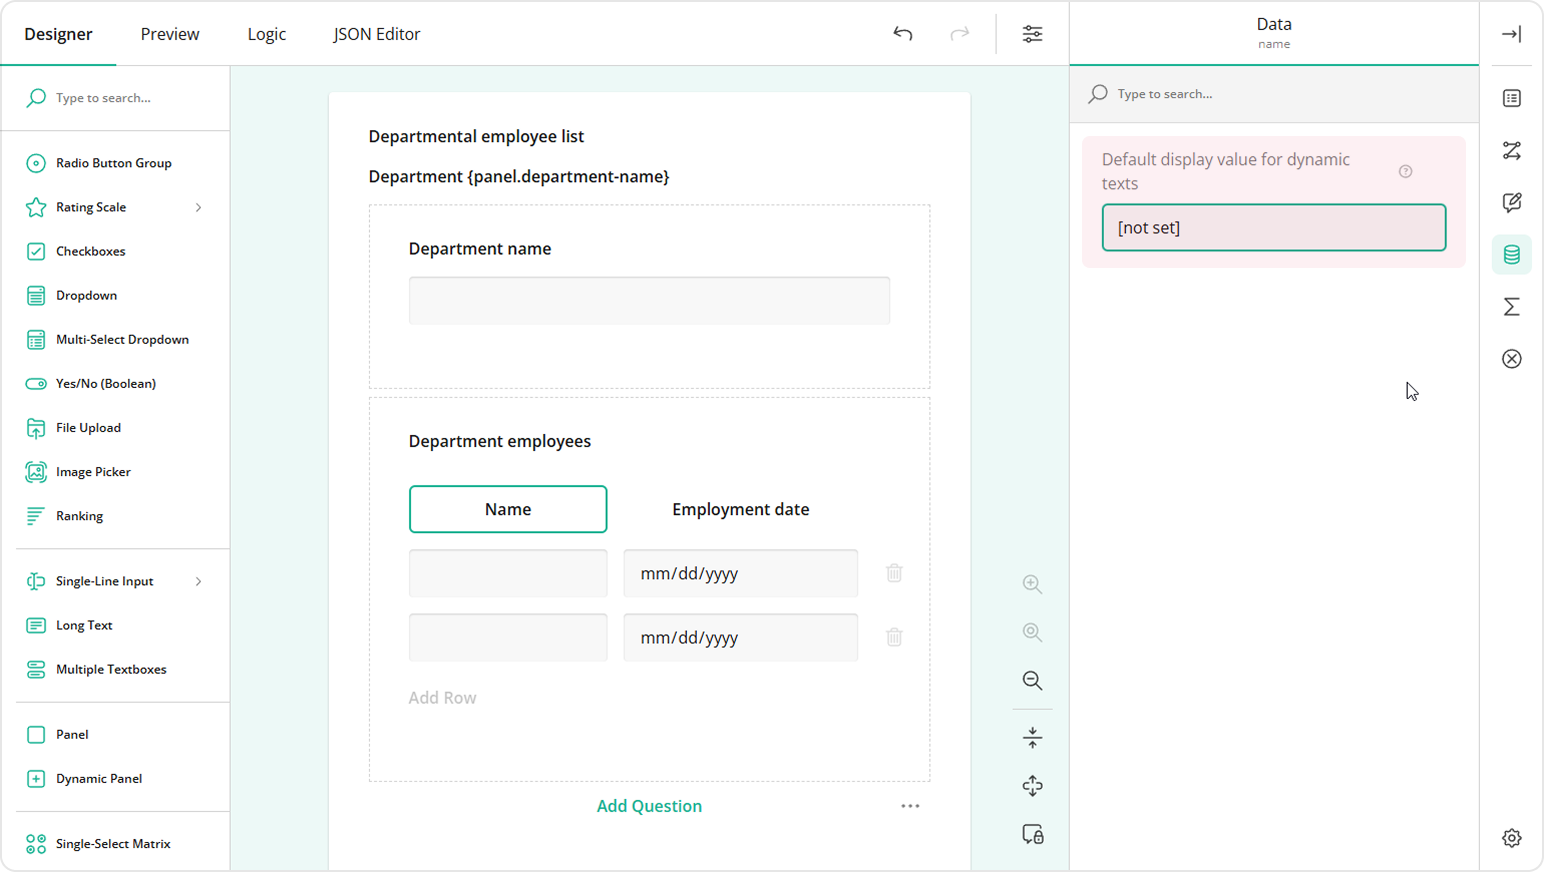
To gather employee data within each department, we'll add an inner loop using a Dynamic Matrix. This matrix will have two columns: Name for the employee's name and Employment date for the date they were hired.
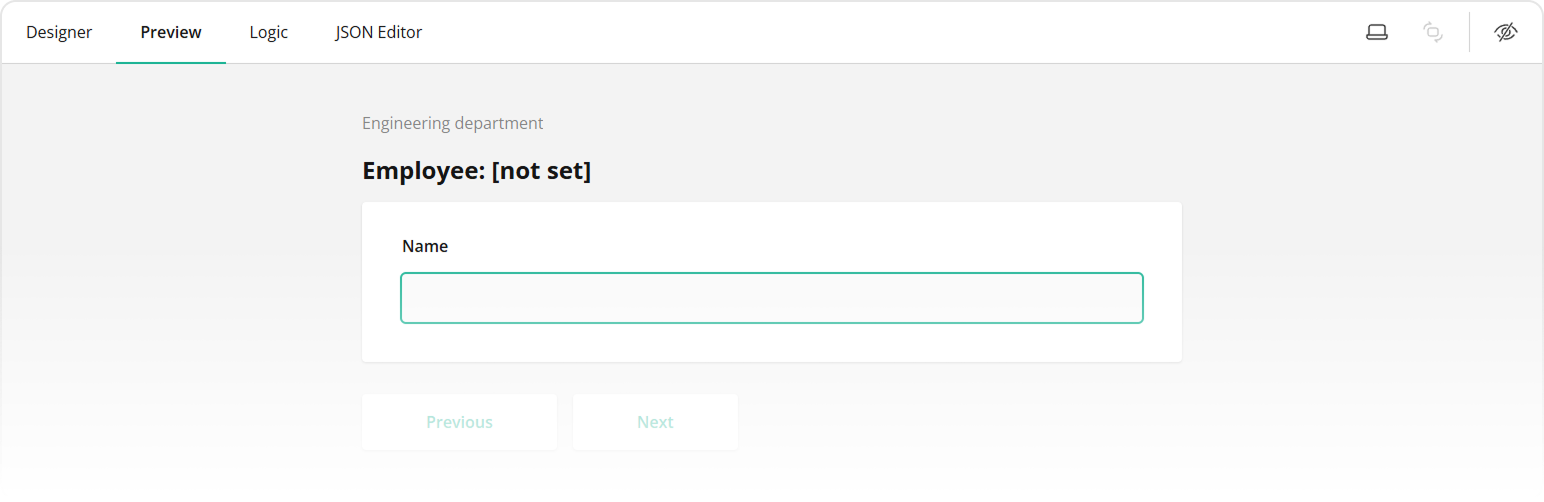
Each row in the matrix represents an individual employee. To make the form more manageable, we'll define a custom title format for each employee entry using the following syntax: Employee: {row.name}. Here, Employee: is a static value, while {row.name} is a path to the dynamic value of the matrix cell with a column ID name. If no name is entered yet, the placeholder [not set] is shown instead. So, until the respondent types a name, the title of the entry will be: Employee: [not set].
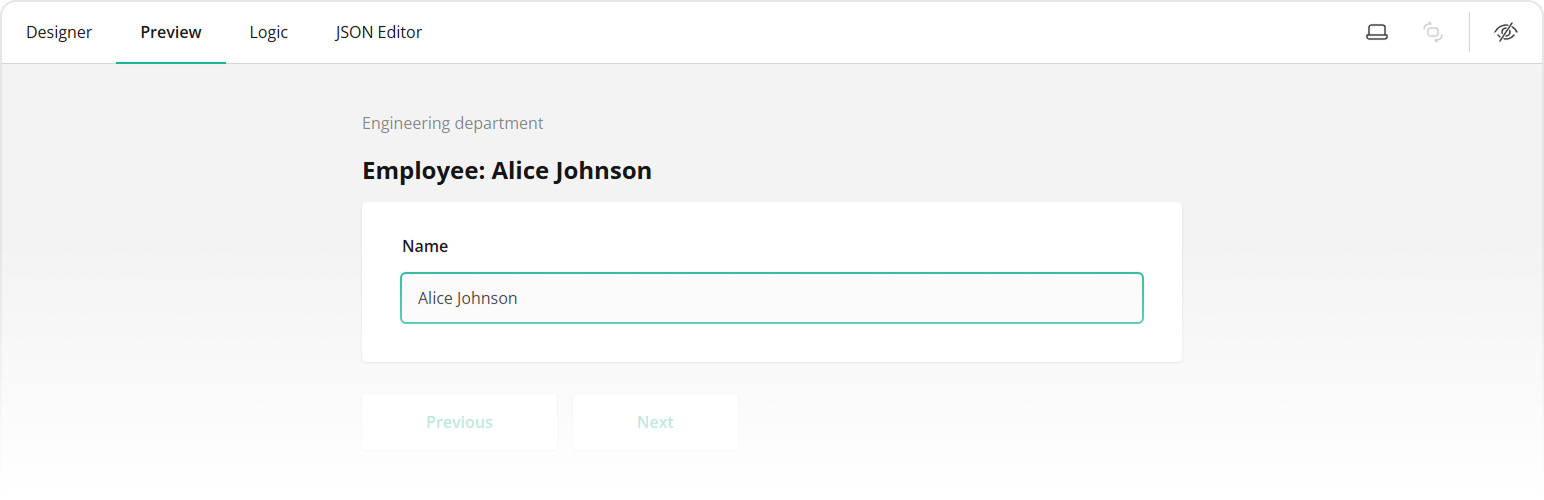
Once a respondent enters a name, like "Alice Johnson", the title will become: Employee: Alice Johnson.
To create an inner repeat group, follow the steps below:
Add a Dynamic Matrix inside the Dynamic Panel.
Assign it a title and a matrix name (ID).
Under Columns, configure two columns as follows:
- First column: Column name:
name, Column title:Name. - Second column: Column name:
date, Column title:Employment date.
- First column: Column name:
Click the Edit icon next to the
Namecolumn and do the following:- Change Cell input type to Single-Line Input.
- Under Data, locate the Default display value for dynamic texts editor and enter
[not set].
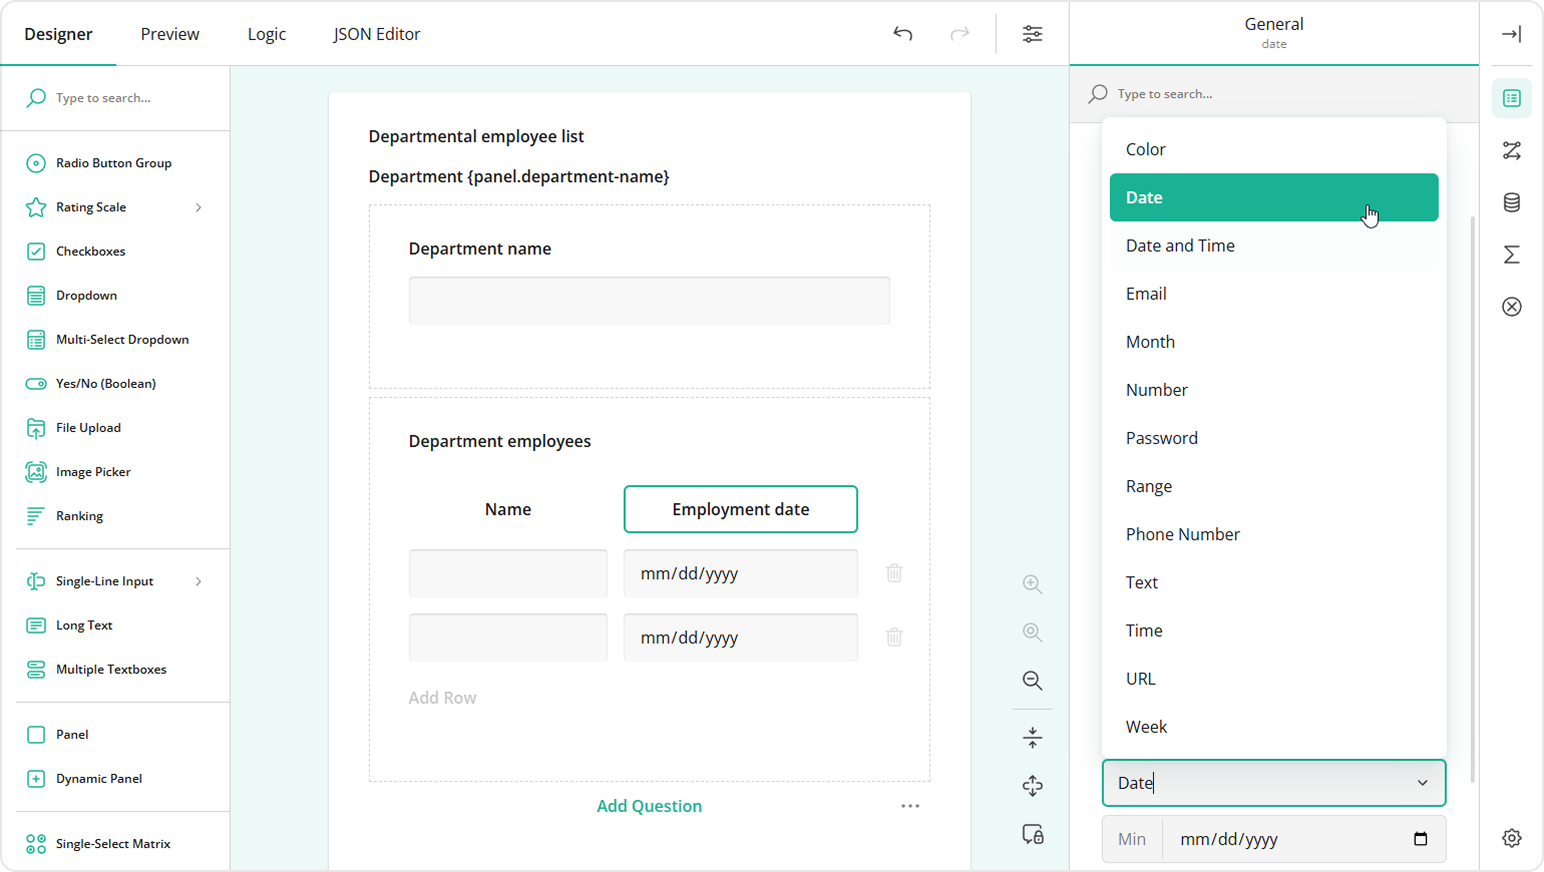
Click the Edit icon next to the
Employment datecolumn and perform the following customization:- Change Cell input type to Single-Line Input.
- Set Input type to Date.
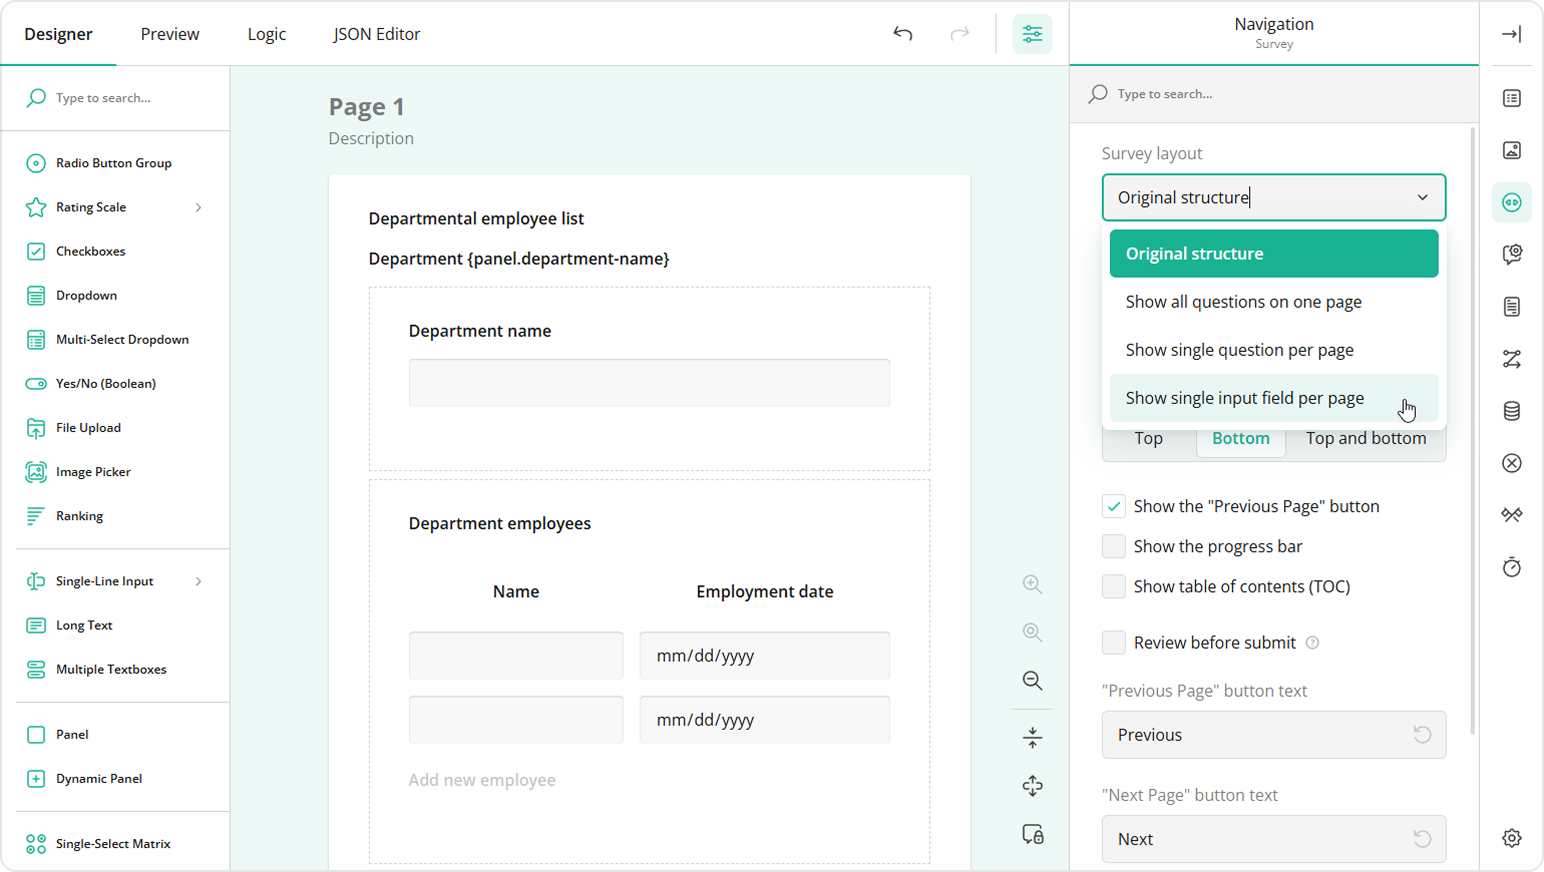
Step 3: Enable Loop and Merge
- Switch to survey-level settings using the form tree menu.
- Under the Navigation category, locate the Survey layout property.
- Set the property to Show single input field per page.
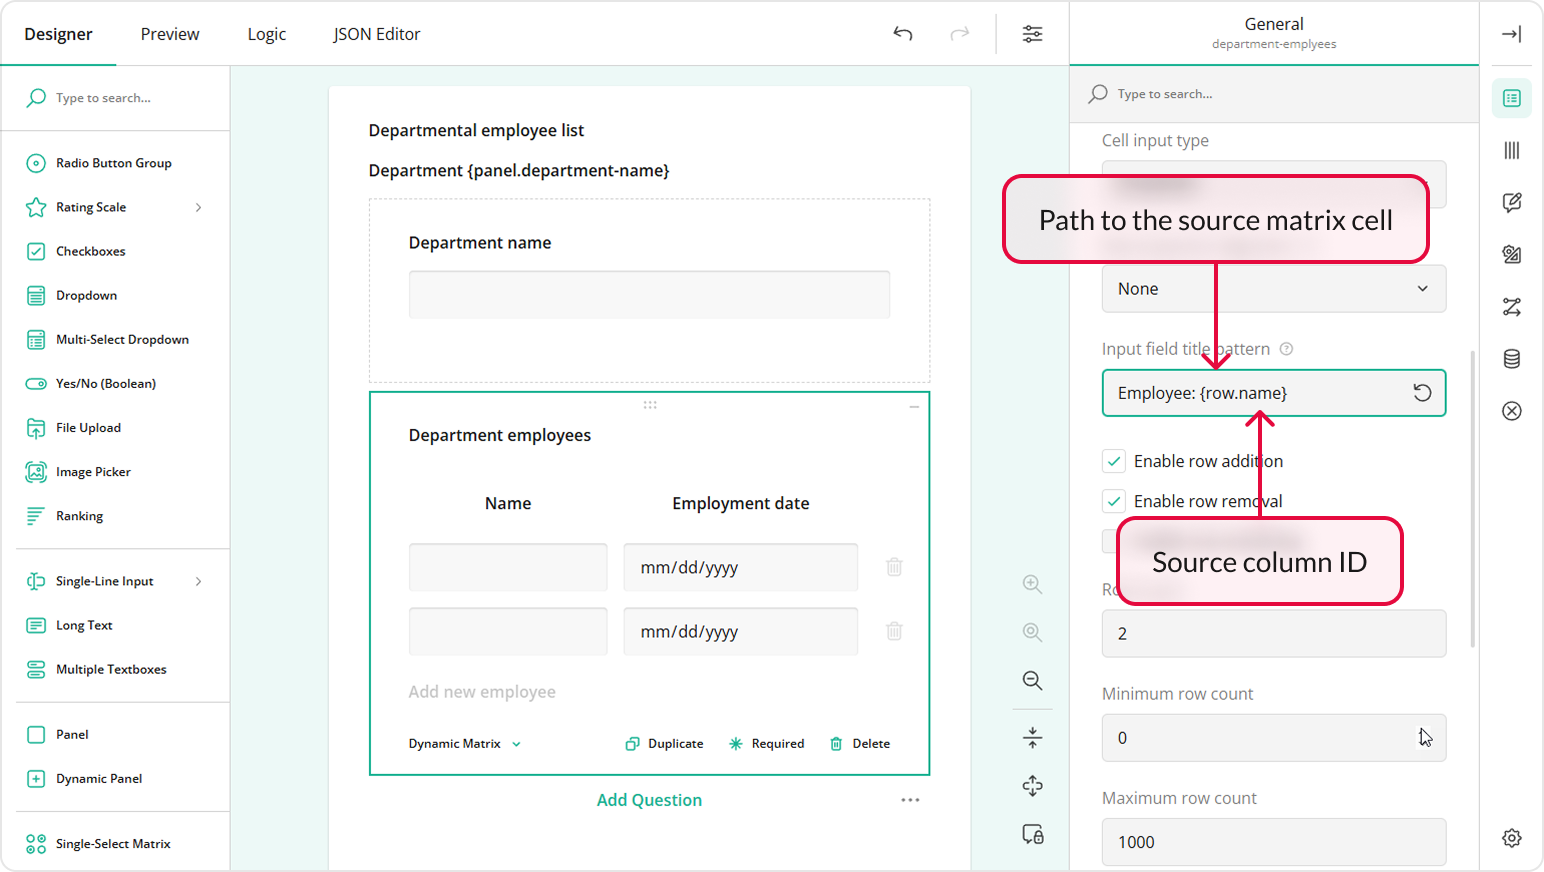
Step 4: Set Dynamic Titles for Inner Group Entries
- Select the Dynamic Matrix.
- Under General, locate Input field title pattern
- Enter
Employee: {row.name}to the property input field, whererowis a keyword for accessing neighboring cells within the dynamic matrix,nameis an ID of the source column, andEmployee:is simply a static value.
This setup will display inner group titles like so:
- Before input:
Employee: [not set]. - After a respondent enters a name, like "Alice Johnson":
Employee: Alice Johnson.
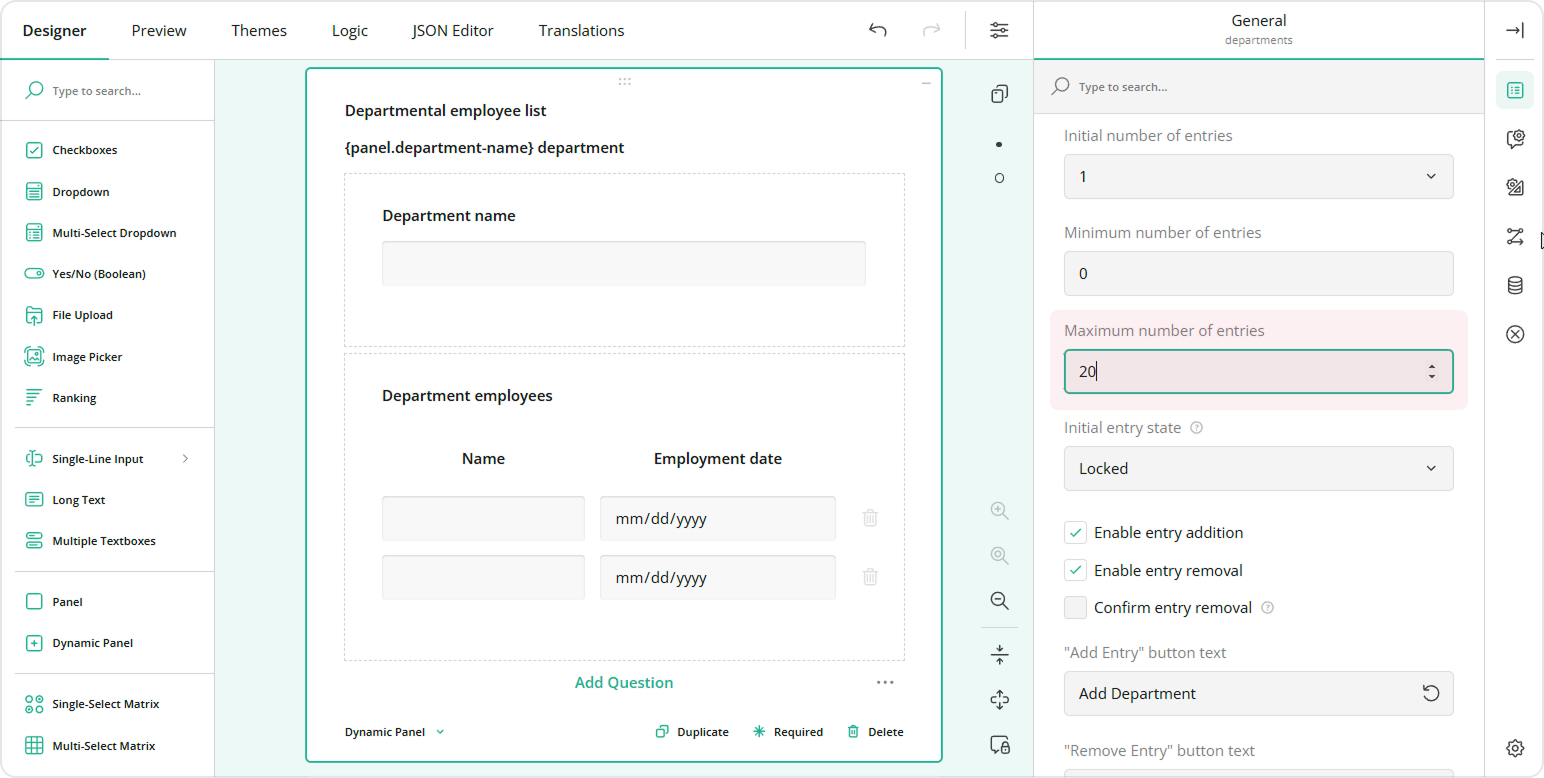
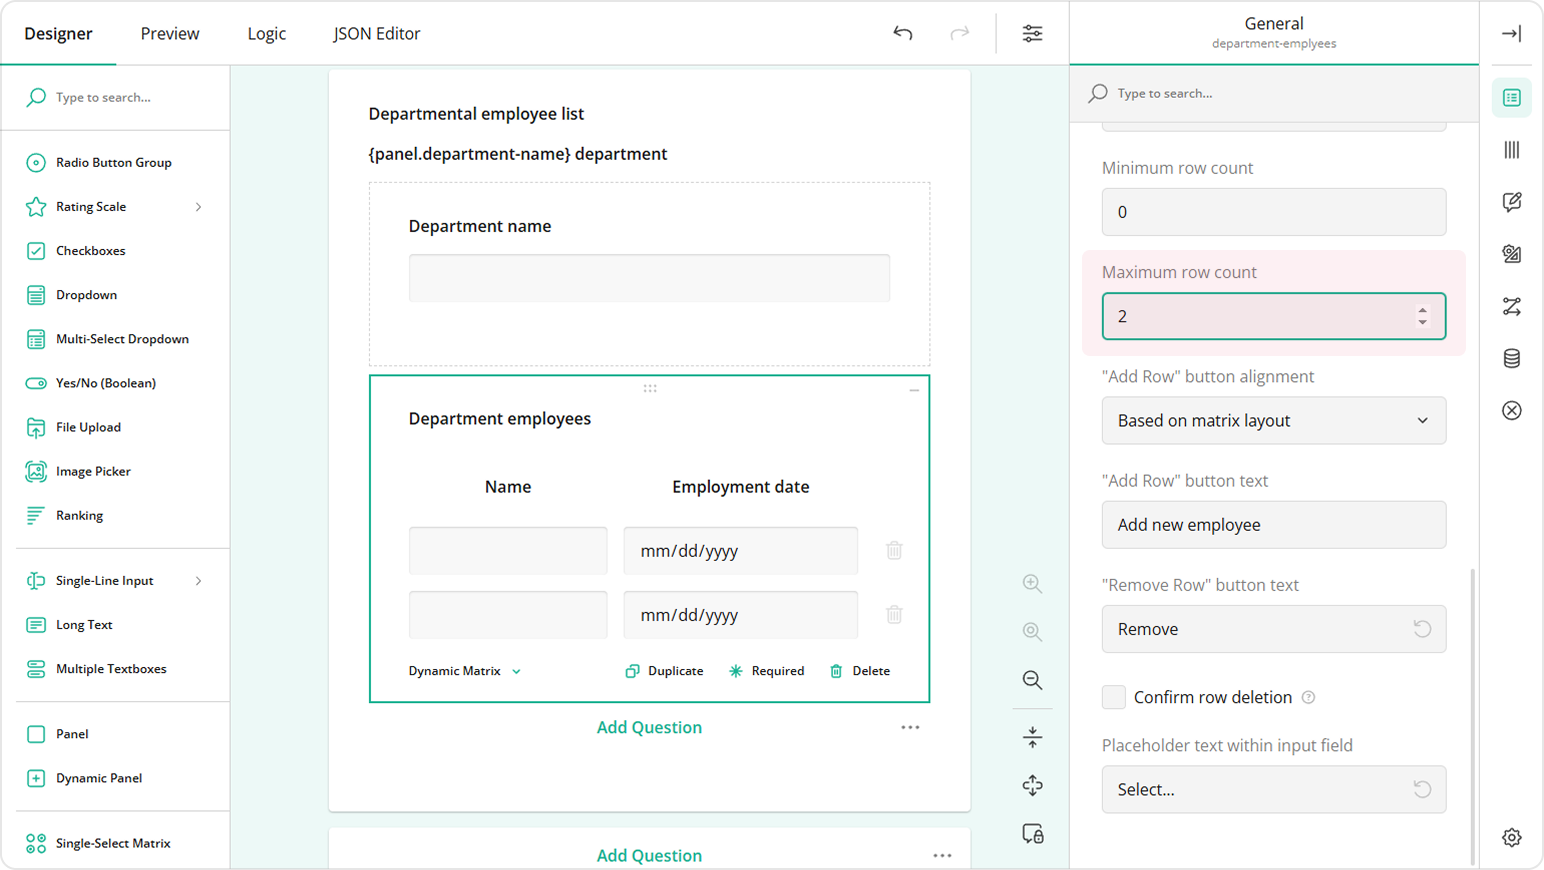
Step 5: Limit the Number of Repeat Groups
To turn the form into a breakable nested repeat group, you can restrict how many entries can be added as follows:
Select the Dynamic Panel, and under the General category, locate the Maximum number of entries setting.
Enter the number of entries you want to allow.
For the Dynamic Matrix, under General, locate the Maximum row count property.
Enter the number of entries you want to allow.
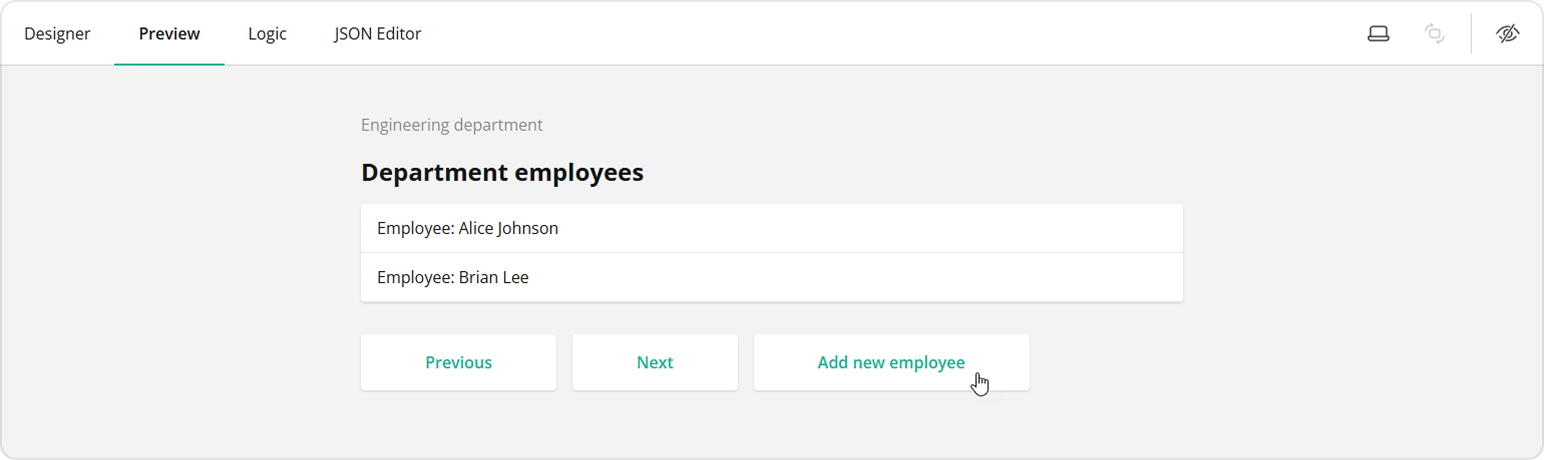
This ensures that once the maximum number of entries is reached, users won't be prompted to add more. Compare:
Before the maximum number of entries reached:
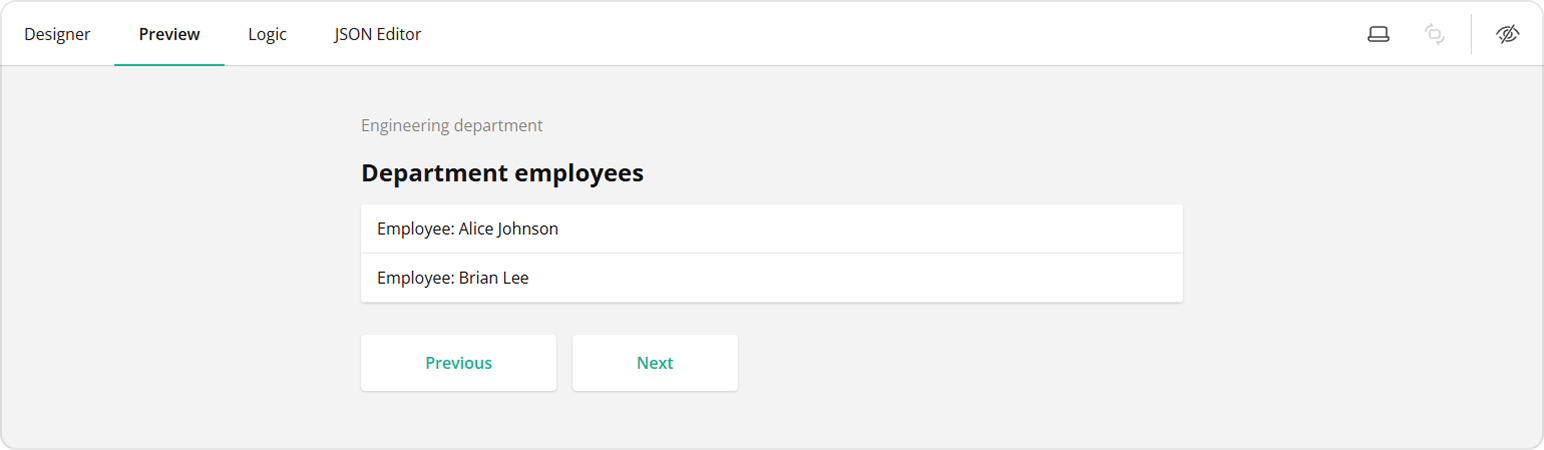
After the maximum number of entries reached:
Watch Full Setup Video
The following video was recorded with the accordion view enabled for the Property Grid. Refer to the Accordion View demo if you want to enable this view for Survey Creator in your application.
Demos
To further enhance your understanding and implementation of nested dynamic panels in SurveyJS, consider exploring the following demos: