Web Form Navigation System: The Ultimate Guide (Part 3)
In the first part of this guide, we will talk about various types of form navigation you can implement with SurveyJS Form Library, including progress indicators, tabs, Previous/Next buttons, jump links, and side navigation (TOC). All these navigation features come out of the box and only require selecting a few configuration settings.
The second part of the guide covers the process of adding a new navigation item with a custom function (not just a default button with a modified caption, but a button that calls any function you assign to it).
In the third part of the ultimate form navigation guide, we will show how to create and configure navigation controls outside the form area, which will listen to changes in the form and update the current form page number in real time. We will also show how to implement external navigation buttons, which can be placed anywhere on a page and will allow you to move forward or backward through a form or survey without clicking any buttons inside the form itself. With this external navigation in place, you can have a pure form widget with no navigation elements and control it from outside the form area.

Prerequisites
SurveyJS supports integration with all popular JavaScript frameworks. In this tutorial, we will be adding a survey to a React application (please refer to the getting started guide for more details). First, install the survey-react-ui npm package using the following command:
npm install survey-react-ui --save
The survey-core and react packages will be installed automatically because both are listed in survey-react-ui dependencies. Once they're installed, import the Model module from the survey-core package and the Survey module from the rendering survey-react-ui package, and configure the style of a form by importing the following style sheet:
import 'survey-core/survey-core.min.css';
As you probably know, SurveyJS uses the JSON format to describe survey data models and exchange those JSON objects between the client and the server. So, you can either create a data model in JSON manually (please refer to the API references to learn more about its properties, methods, and events) or use a free full-scale demo of Survey Creator, a self-hosted no-code form builder tool. Once done, import survey data in JSON format as well - in our example, it’s imported from the json.js file. Here is what you should have in your EDI:
import React from "react";
import { Model } from "survey-core";
import { Survey } from "survey-react-ui";
import "survey-core/survey-core.min.css";
import "./index.css";
import { json } from "./json";
Adding Event Listeners
Declare a new survey state variable and initialize it to a new instance of the Model class from the survey-core library using the json object as a parameter. The useState function is a React hook that lets you add the React state to function components.
function SurveyComponent() {
  const [survey] = React.useState(new Model(json));
// ...
}
Now add an event listener to the onCurrentPageChanged event of the survey object, which is raised when a user navigates to a different page in the survey. The listener function increments the pageChangeCounter state variable by 1 using the setPageChangeCounter function, which triggers re-rendering of the component.
survey.onCurrentPageChanged.add((sender, options) => {
  setPageChangeCounter(pageChangeCounter + 1);
});
Add another event listener to the onComplete event of the survey object, which is raised when the survey is completed. Like the previous listener, it also increments the pageChangeCounter state variable by 1.
Register one more callback function, which will be executed when a respondent completes the survey. But this time, call the log method on the global console object using JSON.stringify() as a parameter to log survey data to the console in JSON format.
survey.onComplete.add((sender, options) => {
  setPageChangeCounter(pageChangeCounter + 1);
});
survey.onComplete.add((sender, options) => {
  console.log(JSON.stringify(sender.data, null, 3));
});
For more information on how to access and store user responses, refer to the following guide: Handle Survey Results.
Now declare a second pageChangeCounter state variable and initialize it to 0 using the useState hook. This variable will be used to keep track of the number of times a user has navigated between survey pages.
const [pageChangeCounter, setPageChangeCounter] = React.useState(0);
Configuring Survey Navigation
Declare three functions to control navigation of a survey. The prevPageFunc() function calls the prevPage() method of the survey object and moves the survey to the previous page. The nextPageFunc() function calls the nextPage() method and moves the survey to the next page. And the completePageFunc() function calls the tryComplete() method to complete the survey.
const prevPageFunc = () => { survey.prevPage(); };
const nextPageFunc = () => { survey.nextPage(); };
const completePageFunc = () => { survey.tryComplete(); };
To change an active survey page based on the selected page number, specify the currentPageNo property as shown below:
const changePageIndexDirectly = (evt) => { survey.currentPageNo = evt.target.value; };
Now create a constant variable renderButton and initialize it to an arrow function. The function takes text (the label of the button), func (the function to be called when the button is clicked), and canRender (a boolean indicating whether the button should be rendered or not) as parameters. If the canRender parameter is false, the button is not rendered.
const renderButton = (text, func, canRender) => {
  if (!canRender) return undefined;
  return (<button className="navigation-button" onClick={func}>{text}</button>);
};
Adding an External Navigation Component
In order to create a navigation component outside the form, define a renderExternalNavigation function using the arrow function with no parameters. The function first checks if the survey is currently in a "running" state, meaning that it is active and ready to be navigated. If the survey is not running, no navigation controls will be rendered.
If the survey is running, the function creates and returns a block of HTML elements for survey navigation controls. The first child div contains the Previous, Next, and Complete buttons, the current page number, and the total number of pages in the survey. The second child div contains text that instructs the user on how to directly navigate to a specific page in the survey without going through the validation process (for example, if certain questions of a survey are set as required), and a list of page options to select from.
const renderExternalNavigation = () => {
       if(survey.state !== "running") return undefined;
       const progressText = "Page " + (survey.currentPageNo + 1) + " of " + survey.visiblePages.length;
       const progressSpan = <span className="navigation-text">{progressText}</span>;
       const pageSelectorOptions = [];
       for (let i = 0; i < survey.visiblePages.length; i++) {
           const name = "Page " + (i + 1);
           pageSelectorOptions.push(<option key={i} value={i}>{name}</option>);
       }
       const pageSelector = (
           <select className="navigation-page-selector" value={survey.currentPageNo} onChange={changePageIndexDirectly}>
               {pageSelectorOptions}
           </select>
       );
       return <div className="navigation-block">
           <div>
               {progressSpan}
               {renderButton("Prev", prevPageFunc, !survey.isFirstPage)}
               {renderButton("Next", nextPageFunc, !survey.isLastPage)}
               {renderButton("Complete", completePageFunc, survey.isLastPage)}
           </div>
           <div>
               <span className="navigation-text">Go to page directly without validation:</span>
               {pageSelector}
           </div>
        </div>
   };

   return (
       <div>
           {renderExternalNavigation()}
           <Survey model={survey} />
       </div>
   );
// ...
}
As you created the custom external navigation, you may wish to hide the default survey navigation bar by disabling the survey.showNavigationButtons option.
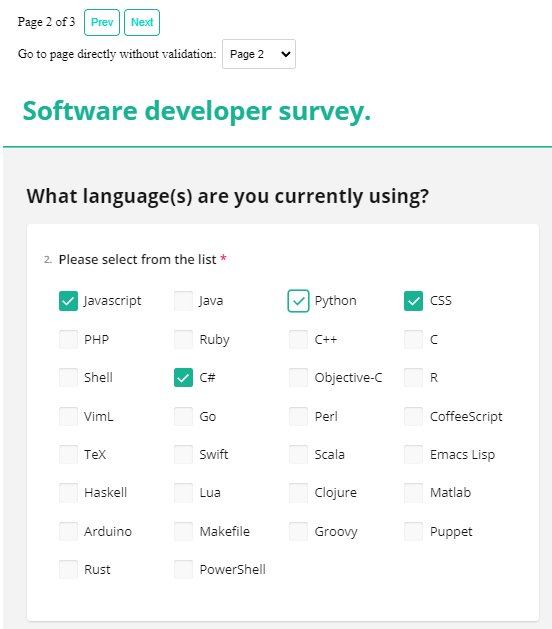
This is how the navigation bar appears for a running survey:
Demo
If you want to see a full-scale Code Sandbox demo, click the 'Edit in Code Sandbox' button below:

Summary
As you can see, SurveyJS provides you with multiple navigation options out of the box and lets you create custom components that are controlled from outside the form widget. In the final part of this guide, we will show you how to create a custom navigation component - a percentage progress bar - within the survey.