Build Dynamic Forms in NextJS with SurveyJS Survey Creator
SurveyJS Survey Creator is a self-hosted form solution that offers significant advantages for organizations that require full control over data. Unlike cloud-based form builders, Survey Creator allows organizations to store surveys and user responses within their own infrastructure. This approach supports compliance with data privacy regulations and avoids vendor lock-in.
This tutorial demonstrates how to integrate the SurveyJS Form Builder (Survey Creator) into a Next.js application. We'll build a simple user interface that allows users to design surveys and save/load them to/from the browser's localStorage.
What You'll Learn
By the end of this tutorial, you'll have implemented:
- A new Next.js application with integrated SurveyJS form builder
- A custom form builder theme that aligns with your application's overall design
- Functionality to save and load survey definitions using the browser's
localStorage - An option to save surveys as PDF documents
Prerequisites
Before we begin, ensure that you have the following:
- Node.js (version 16 or higher) installed
- Basic knowledge of React and Next.js
- Familiarity with JavaScript or TypeScript
Step 1: Create a New Next.js Application
Let's start by creating a new Next.js application. Open your terminal and run:
npx create-next-app@latest surveyjs-form-builder
cd surveyjs-form-builder
When prompted, choose the following options:
- TypeScript: Yes
- ESLint: Yes
- Tailwind CSS: Yes (Optional, for styling)
- Code inside a
src/directory: Yes - App Router: Yes
- Turbopack for
next dev: No - Place files to src: Yes
- Customize default import alias: No
Once the installation is complete, navigate to your project directory and start the development server:
npm run dev
Your Next.js application should now be running at http://localhost:3000.
Step 2: Install SurveyJS Form Builder
SurveyJS Survey Creator runs entirely within your own infrastructure and connects to your own backend storage systems. It generates form definitions that are rendered using the SurveyJS Form Library.
In this demo, we'll save and load user-created forms using the browser's localStorage. In a real-world setup, you would configure the form builder to work with your preferred storage system.
Run the following command to install the latest SurveyJS Survey Creator package:
npm install survey-creator-react --save
Optionally, you can install the Ace code editor if you want to facilitate direct editing of survey JSON for users and make the process more convenient:
npm install ace-builds --save
Step 3: Create the Form Builder Component
Create a FormBuilder.tsx component in the src/components directory. This component will contain the SurveyJS form builder:
// src/components/FormBuilder.tsx
'use client';

import { useEffect, useRef } from 'react';
import {
  ICreatorOptions,
  ICreatorTheme,
  getLocaleStrings,
  registerCreatorTheme
} from 'survey-creator-core';
import {
  SurveyCreatorComponent,
  SurveyCreator
} from 'survey-creator-react';
import 'survey-core/survey-core.css';
import 'survey-creator-core/survey-creator-core.css';
import 'ace-builds/src-noconflict/ace';
import 'ace-builds/src-noconflict/ext-searchbox';
import SurveyCreatorTheme from "survey-creator-core/themes";

// Add predefined Survey Creator UI themes
registerCreatorTheme(SurveyCreatorTheme);

const defaultCreatorOptions: ICreatorOptions = {
  showTranslationTab: true,
  showThemeTab: true,
  autoSaveEnabled: true // Call `saveSurveyFunc` on each survey JSON change
};

export default function FormBuilderComponent(props: {
  onSaveSurvey: (json: object) => void;
  json?: object;
  options?: ICreatorOptions;
}) {
  const creatorRef = useRef<SurveyCreator | null>(null);

  if (!creatorRef.current) {
    const creator = new SurveyCreator(props.options || defaultCreatorOptions);

    // Save the survey JSON schema
    creator.saveSurveyFunc = (no: number, callback: (no: number, success: boolean) => void) => {
      props.onSaveSurvey(creator.JSON);
      callback(no, true);
    };

    creatorRef.current = creator;
  }

  const creator = creatorRef.current;

  // Set JSON when it comes from a parent component
  useEffect(() => {
    if (props.json) {
      creator.JSON = props.json;
    }
  }, [props.json, creator]);

  return (
    <div style={{ height: '100%', width: '100%' }}>
      <SurveyCreatorComponent creator={creator} />
    </div>
  );
}
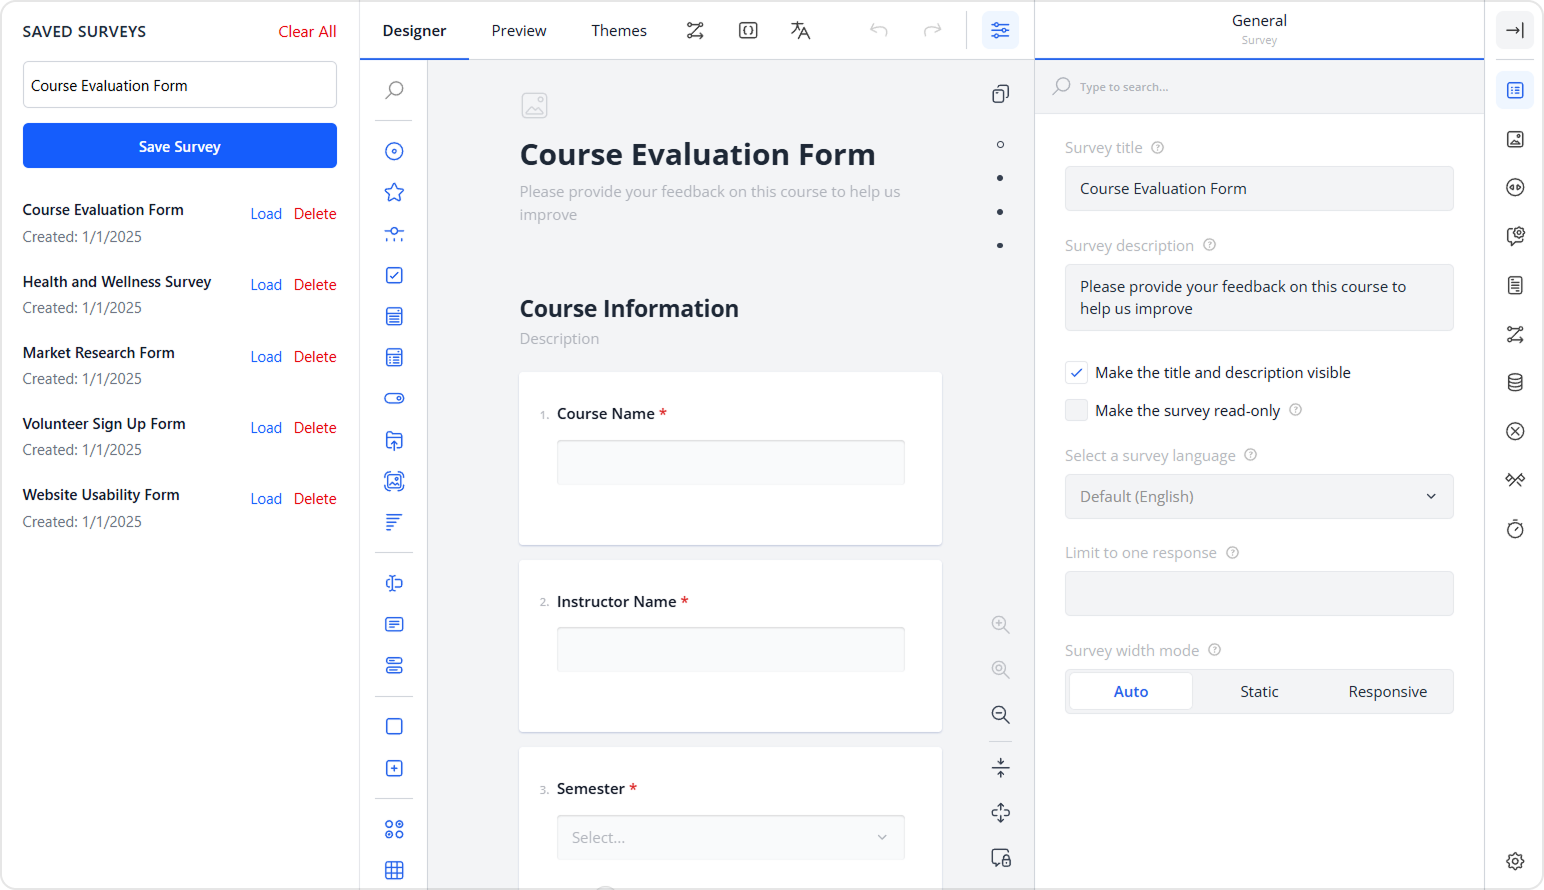
Step 4: Create the Main Application Page
Now, let's create the main page that will use our form builder. On this page, create a sample UI that allows users to save edited surveys and load them through a simple list view.
Replace the contents of app/page.tsx:
View Full Code
// src/app/page.tsx
'use client'

import { useState, useCallback, useEffect } from 'react';
import dynamic from 'next/dynamic';

// Dynamic import prevents SSR issues
const FormBuilderComponent = dynamic(() => import('@/components/FormBuilder'), {
  ssr: false,
  loading: () => <div className="flex items-center justify-center h-screen">Loading Form Builder...</div>
});

const STORAGE_KEY = 'surveyjs-form-definitions';

export default function Home() {
  const [surveyJson, setSurveyJson] = useState<any>(null);
  const [savedSurveys, setSavedSurveys] = useState<any[]>([]);
  const [currentSurveyName, setCurrentSurveyName] = useState<string>('');
  const [isLoading, setIsLoading] = useState(true);

  // Load saved surveys from localStorage on component mount
  useEffect(() => {
    const saved = localStorage.getItem(STORAGE_KEY);
    if (saved) {
      setSavedSurveys(JSON.parse(saved));
    }
    setIsLoading(false);
  }, []);

  const handleSurveyChange = useCallback((json: any) => {
    setSurveyJson(json);
  }, []);

  const saveSurvey = useCallback(() => {
    if (!surveyJson || !currentSurveyName.trim()) {
      alert('Please enter a survey name and create a survey first.');
      return;
    }
    const newSurvey = {
      id: Date.now(),
      name: currentSurveyName,
      json: surveyJson,
      createdAt: new Date().toISOString(),
      updatedAt: new Date().toISOString()
    };

    const updatedSurveys = [...savedSurveys, newSurvey];
    setSavedSurveys(updatedSurveys);
    localStorage.setItem(STORAGE_KEY, JSON.stringify(updatedSurveys));
    setCurrentSurveyName('');
    alert('Survey saved successfully!');
  }, [surveyJson, currentSurveyName, savedSurveys]);

  const loadSurvey = useCallback((survey: any) => {
    setSurveyJson(survey.json);
    setCurrentSurveyName(survey.name);
  }, []);

  const deleteSurvey = useCallback((surveyId: number) => {
    if (confirm('Are you sure you want to delete this survey?')) {
      const updatedSurveys = savedSurveys.filter(s => s.id !== surveyId);
      setSavedSurveys(updatedSurveys);
      localStorage.setItem(STORAGE_KEY, JSON.stringify(updatedSurveys));
    }
  }, [savedSurveys]);

  const clearAllSurveys = useCallback(() => {
    if (confirm('Are you sure you want to clear all saved surveys?')) {
      setSavedSurveys([]);
      localStorage.removeItem(STORAGE_KEY);
    }
  }, []);

  if (isLoading) {
    return <div className="flex items-center justify-center h-screen">Loading...</div>;
  }

  return (
    <div className="min-h-screen bg-gray-50">
      {/* Header */}
      <header className="bg-white shadow-sm border-b">
        <div className="max-w-7xl mx-auto px-4 sm:px-6 lg:px-8">
          <div className="flex justify-between items-center h-16">
            <h1 className="text-2xl font-bold text-gray-900">SurveyJS Form Builder</h1>
            <div className="flex items-center space-x-4">
              <input
                type="text"
                placeholder="Enter survey name..."
                value={currentSurveyName}
                onChange={(e) => setCurrentSurveyName(e.target.value)}
                className="px-3 py-2 border border-gray-300 rounded-md focus:outline-none focus:ring-2 focus:ring-blue-500"
              />
              <button
                onClick={saveSurvey}
                className="px-4 py-2 bg-blue-600 text-white rounded-md hover:bg-blue-700 focus:outline-none focus:ring-2 focus:ring-blue-500"
              >
                Save Survey
              </button>
            </div>
          </div>
        </div>
      </header>

      <div className="flex h-[calc(100vh-4rem)]">
        {/* Sidebar */}
        <aside className="w-80 bg-white shadow-sm border-r overflow-y-auto">
          <div className="p-4">
            <div className="flex justify-between items-center mb-4">
              <h2 className="text-lg font-semibold text-gray-900">Saved Surveys</h2>
              {savedSurveys.length > 0 && (
                <button
                  onClick={clearAllSurveys}
                  className="text-sm text-red-600 hover:text-red-800"
                >
                  Clear All
                </button>
              )}
            </div>
            {savedSurveys.length === 0 ? (
              <p className="text-gray-500 text-sm">No saved surveys yet.</p>
            ) : (
              <div className="space-y-2">
                {savedSurveys.map((survey) => (
                  <div
                    key={survey.id}
                    className="p-3 border border-gray-200 rounded-lg hover:bg-gray-50"
                  >
                    <div className="flex justify-between items-start">
                      <div className="flex-1">
                        <h3 className="font-medium text-gray-900">{survey.name}</h3>
                        <p className="text-sm text-gray-500">
                          Created: {new Date(survey.createdAt).toLocaleDateString()}
                        </p>
                      </div>
                      <div className="flex space-x-2">
                        <button
                          onClick={() => loadSurvey(survey)}
                          className="text-blue-600 hover:text-blue-800 text-sm"
                        >
                          Load
                        </button>
                        <button
                          onClick={() => deleteSurvey(survey.id)}
                          className="text-red-600 hover:text-red-800 text-sm"
                        >
                          Delete
                        </button>
                      </div>
                    </div>
                  </div>
                ))}
              </div>
            )}
          </div>
        </aside>

        {/* Main Content */}
        <main className="flex-1">
          <FormBuilderComponent
            onSaveSurvey={handleSurveyChange}
            json={surveyJson}
          />
        </main>
      </div>
    </div>
  );
}
The code above uses Tailwind directives for styling. To make them available, open the src/app/globals.css file and add the following import at the very top:
/* src/app/globals.css */
@import "tailwindcss";
/* ...
   Custom CSS
   ...
*/
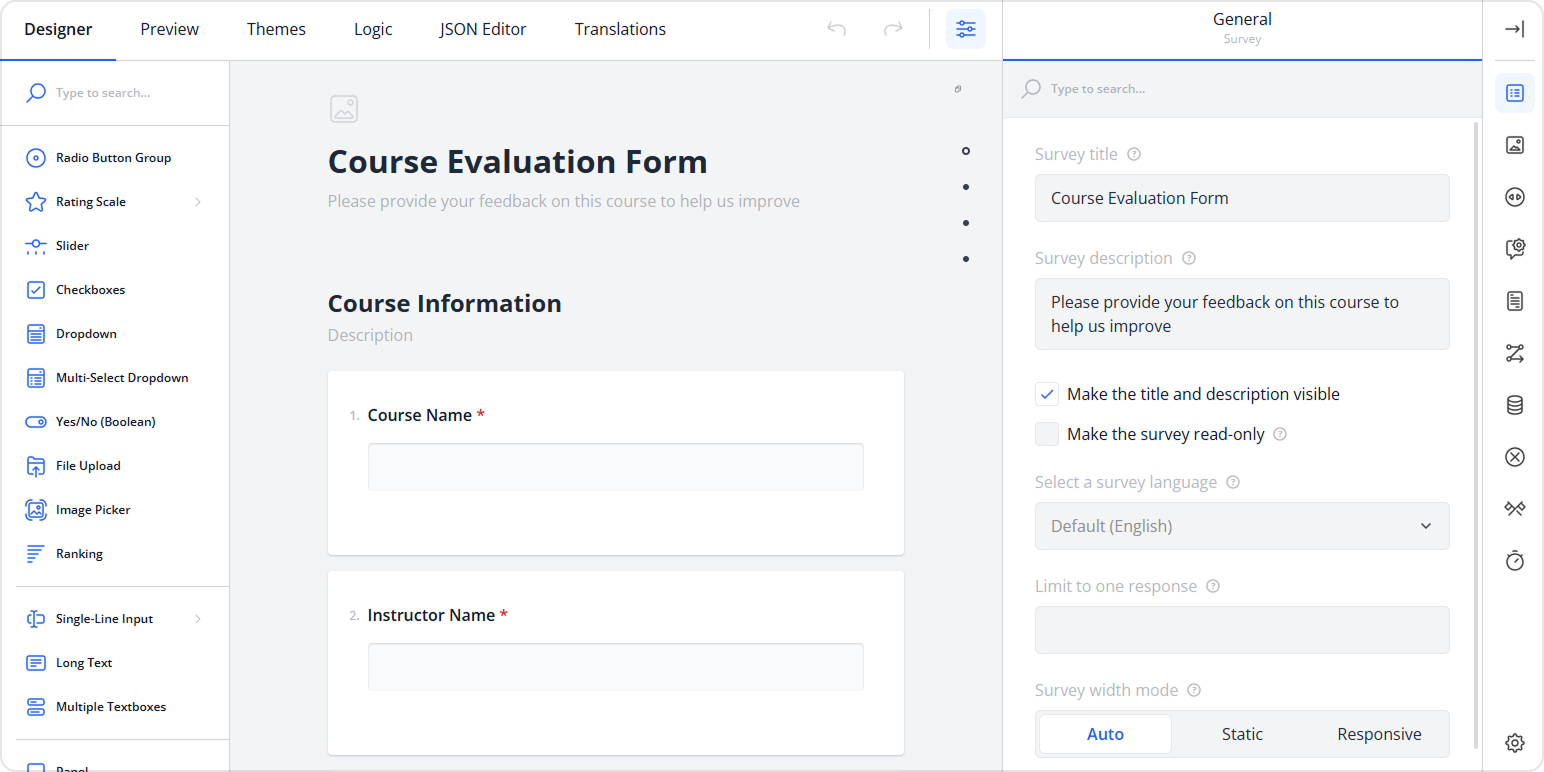
Step 5: Apply a Custom Theme to Form Builder
SurveyJS Creator uses its own styling mechanism to support custom themes and match your application's design. Let's create a custom form builder theme that aligns with the overall application UI.
First, create a theme configuration file:
View Full Code
// src/styles/form-builder-theme.ts
import type { ICreatorTheme } from "survey-creator-core";

const customThemeVariables = {
  "--sjs-layer-1-background-500": "#ffffff",
  "--sjs-layer-1-background-400": "#f3f4f6",
  "--sjs-layer-1-foreground-100": "#111827",
  "--sjs-layer-1-foreground-50": "#6b728080",
  "--sjs-layer-2-background-500": "#f9fafb",
  "--sjs-layer-2-background-400": "#e5e7eb",
  "--sjs-layer-2-foreground-100": "#1f2937",
  "--sjs-layer-2-foreground-75": "#374151",
  "--sjs-layer-2-foreground-50": "#6b728080",
  "--sjs-layer-3-background-500": "#f3f4f6",
  "--sjs-layer-3-background-400": "#e5e7eb",
  "--sjs-layer-3-foreground-100": "#1f2937",
  "--sjs-layer-3-foreground-75": "#374151",
  "--sjs-layer-3-foreground-50": "#6b728080",

  "--sjs-primary-background-500": "#2563eb",
  "--sjs-primary-background-400": "#3b82f6",
  "--sjs-primary-background-10": "#eff6ff",
  "--sjs-primary-foreground-100": "#ffffff",
  "--sjs-primary-foreground-25": "#ffffff40",

  "--sjs-secondary-background-500": "#9333ea",
  "--sjs-secondary-background-400": "#a855f7",
  "--sjs-secondary-background-25": "#a855f740",
  "--sjs-secondary-background-10": "#f5f3ff",
  "--sjs-secondary-foreground-100": "#ffffff",
  "--sjs-secondary-forecolor-25": "#ffffff40",

  "--sjs-border-25": "#d1d5db",
  "--sjs-border-10": "#e5e7eb",
  "--sjs-border-25-overlay": "#00000026",

  "--sjs-semantic-red-background-500": "#dc2626",
  "--sjs-semantic-red-background-10": "#fee2e2",
  "--sjs-semantic-red-foreground-100": "#ffffff",

  "--sjs-semantic-green-background-500": "#16a34a",
  "--sjs-semantic-green-background-10": "#d1fae5",
  "--sjs-semantic-green-foreground-100": "#ffffff",

  "--sjs-semantic-blue-background-500": "#2563eb",
  "--sjs-semantic-blue-background-10": "#eff6ff",
  "--sjs-semantic-blue-foreground-100": "#ffffff",

  "--sjs-semantic-yellow-background-500": "#f59e0b",
  "--sjs-semantic-yellow-background-10": "#fef3c7",
  "--sjs-semantic-yellow-foreground-100": "#ffffff",

  "--sjs-semantic-white-background-500": "#ffffff",

  "--sjs-special-haze": "#2563eb40",
  "--sjs-special-glow": "#2563eb33",
  "--sjs-special-shadow": "#1e3a8a40",
  "--sjs-special-background": "#f3f4f6",

  "--sjs-code-gray-700": "#6b7280",
  "--sjs-code-gray-500": "#9ca3af",
  "--sjs-code-gray-300": "#d1d5db",
  "--sjs-code-blue-500": "#3b82f6",
  "--sjs-code-green-500": "#10b981",
  "--sjs-code-red-500": "#ef4444",
  "--sjs-code-purple-500": "#8b5cf6",
  "--sjs-code-yellow-500": "#eab308"
};

export const creatorTheme: ICreatorTheme = {
  themeName: "custom-creator-theme",
  cssVariables: { ...customThemeVariables }
};
Update your FormBuilder.tsx component as follows:
- Call the static
registerCreatorTheme()method to add a custom theme to the theme list. To access this list, users can click the Creator Settings button in the bottom right corner of the Survey Creator UI. - Call the
applyCreatorTheme(creatorTheme)method on aSurveyCreatorinstance to apply a custom theme at form builder startup.
// ...
import { creatorTheme } from "/styles/form-builder-theme";

function addCustomTheme(theme: ICreatorTheme, userFriendlyThemeName: string) {
  const enLocale = getLocaleStrings('en');
  const themeName = theme.themeName || "customTheme";
  (enLocale.creatortheme.names as Record<string, string>)[themeName] = userFriendlyThemeName;
  registerCreatorTheme(theme);
}

addCustomTheme(creatorTheme, "Custom Theme");
//...
export default function FormBuilderComponent(props: { ... }) {
  const creatorRef = useRef<SurveyCreator | null>(null);

  if (!creatorRef.current) {
    // ...
    creator.applyCreatorTheme(creatorTheme);
    creatorRef.current = creator;
  }

  const creator = creatorRef.current;
  // ...
  return (
    // ...
  );
}
View Full Code
// src/components/FormBuilder.tsx
'use client';

import { useEffect, useRef } from 'react';
import {
  ICreatorOptions,
  ICreatorTheme,
  getLocaleStrings,
  registerCreatorTheme
} from 'survey-creator-core';
import {
  SurveyCreatorComponent,
  SurveyCreator
} from 'survey-creator-react';
import 'survey-core/survey-core.css';
import 'survey-creator-core/survey-creator-core.css';
import 'ace-builds/src-noconflict/ace';
import 'ace-builds/src-noconflict/ext-searchbox';
import SurveyCreatorTheme from "survey-creator-core/themes";
import { creatorTheme } from '../styles/form-builder-theme';

registerCreatorTheme(SurveyCreatorTheme);

function addCustomTheme(theme: ICreatorTheme, userFriendlyThemeName: string) {
  const enLocale = getLocaleStrings('en');
  const themeName = theme.themeName || "customTheme";
  (enLocale.creatortheme.names as Record<string, string>)[themeName] = userFriendlyThemeName;
  registerCreatorTheme(theme);
}

addCustomTheme(creatorTheme, 'Custom Theme');

const defaultCreatorOptions: ICreatorOptions = {
  showTranslationTab: true,
  showThemeTab: true,
  autoSaveEnabled: true
};

export default function FormBuilderComponent(props: {
  onSaveSurvey: (json: object) => void;
  json?: object;
  options?: ICreatorOptions;
}) {
  const creatorRef = useRef<SurveyCreator | null>(null);

  if (!creatorRef.current) {
    const creator = new SurveyCreator(props.options || defaultCreatorOptions);

    creator.saveSurveyFunc = (
      no: number,
      callback: (no: number, success: boolean) => void
    ) => {
      props.onSaveSurvey(creator.JSON);
      callback(no, true);
    };

    creator.applyCreatorTheme(creatorTheme);

    creatorRef.current = creator;
  }

  const creator = creatorRef.current;

  useEffect(() => {
    if (props.json) {
      creator.JSON = props.json;
    }
  }, [props.json, creator]);

  return (
    <div style={{ height: '100%', width: '100%' }}>
      <SurveyCreatorComponent creator={creator} />
    </div>
  );
}
For more information on how to customize Form Builder appearance and create custom themes, visit Themes & Styles.
The rendered web page appears as follows:
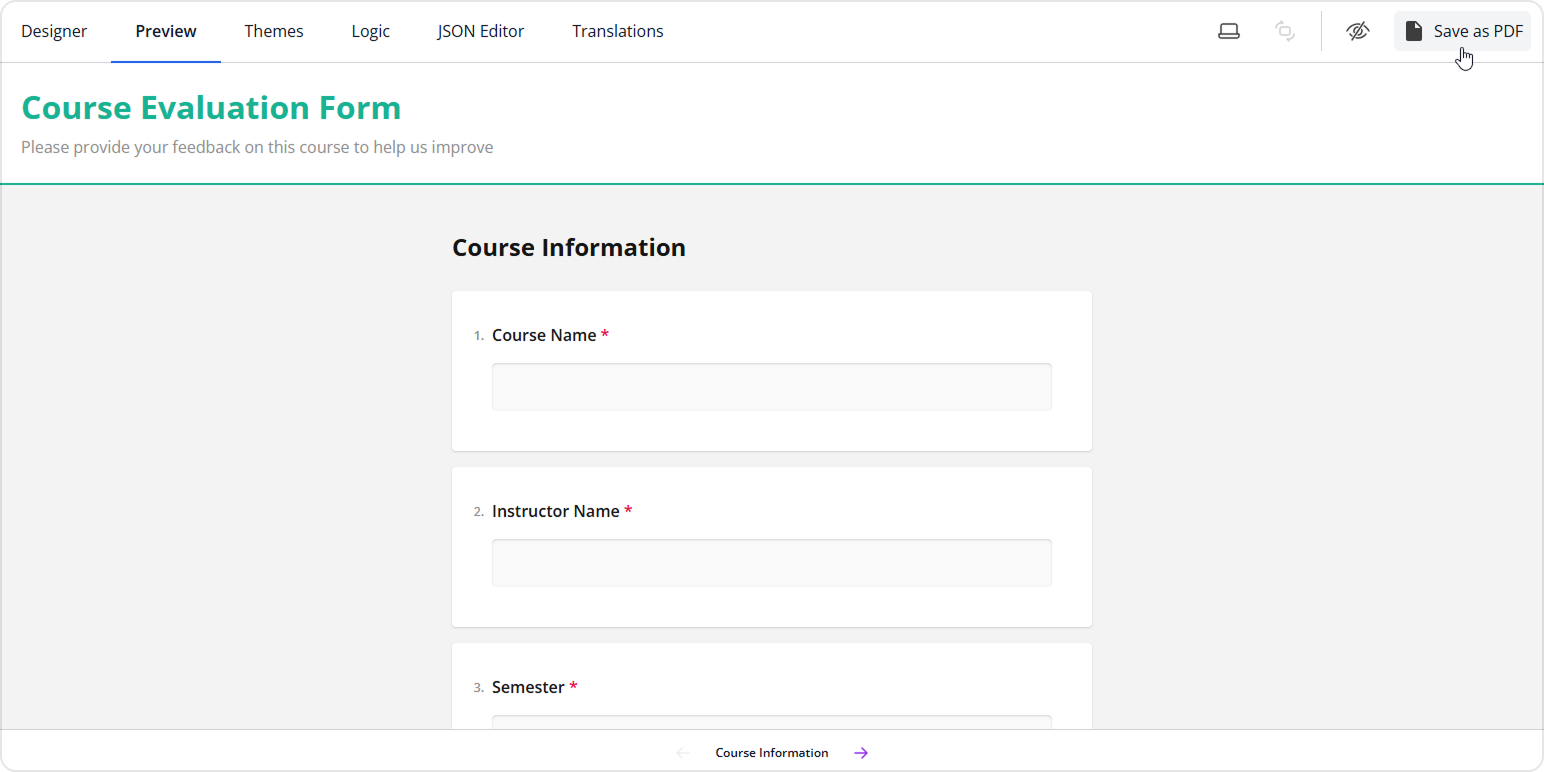
Step 6: Save Surveys as PDF Documents
Let's enhance our form builder with some additional features, such as export to PDF.
Install the survey-pdf package:
npm install survey-pdf --save
Create a surveyPdf.ts file in the src/utils directory. In this file, implement the following functions:
savePdf
Exports a survey to a PDF document using Survey PDF Generator.createPdfAction
Adds toolbar actions to Survey Creator that trigger thesavePdffunction.
// src/utils/surveyPdf.ts
import { SurveyModel, SvgRegistry, Action, ComputedUpdater } from "survey-core";
import { SurveyPDF, IDocOptions } from "survey-pdf";
import { SurveyCreator } from 'survey-creator-react';

function savePdf(survey: SurveyModel) {
  const pdfDocOptions: IDocOptions = {
    fontSize: 14,
    margins: {
      left: 10,
      right: 10,
      top: 10,
      bot: 10
    },
    format: [210, 297]
  };
  const surveyPDF = new SurveyPDF(survey.toJSON(), pdfDocOptions);
  surveyPDF.readOnly = survey.pdfReadonly;
  surveyPDF.locale = survey.locale;
  surveyPDF.data = survey.data;
  surveyPDF.save(survey.pdfFileName);
}

export function createPdfAction(creator: SurveyCreator) {
  const customIcon = '<svg viewBox="0 0 24 24" xmlns="http://www.w3.org/2000/svg"><path d="M6 2a2 2 0 0 0-2 2v16c0 1.1.9 2 2 2h12a2 2 0 0 0 2-2V8l-6-6H6zm7 1.5L18.5 9H13V3.5zM12 13v4.17l-1.59-1.58L9 17l4 4 4-4-1.41-1.41L13 17.17V13h-1z"/></svg>';
  SvgRegistry.registerIcon("icon-savepdf", customIcon);

  const savePdfAction = new Action({
    id: 'svd-save-pdf',
    title: 'Save as PDF',
    iconName: 'icon-savepdf',
    visible: new ComputedUpdater(() => creator.activeTab === 'preview'),
    enabled: true,
    action: () => {
      // eslint-disable-next-line @typescript-eslint/no-explicit-any
      const surveyModel = (creator.getPlugin("preview") as any).model.survey as SurveyModel;
      savePdf(surveyModel);
    }
  });
  creator.toolbar.actions.push(savePdfAction);
  creator.footerToolbar.actions.push(savePdfAction);
}
Open the FormBuilder.tsx component, then import and call the createPdfAction function to enable the Export to PDF feature in the form builder:
// src/components/FormBuilder.tsx
// ...
import { createPdfAction } from '../utils/surveyPdf';
// ...
export default function FormBuilderComponent(props: { ... } ) {
  const creatorRef = useRef<SurveyCreator | null>(null);

  if (!creatorRef.current) {
    const creator = new SurveyCreator(props.options || defaultCreatorOptions);
    // ...
    createPdfAction(creator);

    creatorRef.current = creator;
  }

  const creator = creatorRef.current;
  // ...
  return (
    // ...
  );
}
View Full Code
// src/components/FormBuilder.tsx
'use client';

import { useEffect, useRef } from 'react';
import {
  ICreatorOptions,
  ICreatorTheme,
  getLocaleStrings,
  registerCreatorTheme
} from 'survey-creator-core';
import {
  SurveyCreatorComponent,
  SurveyCreator
} from 'survey-creator-react';
import 'survey-core/survey-core.css';
import 'survey-creator-core/survey-creator-core.css';
import 'ace-builds/src-noconflict/ace';
import 'ace-builds/src-noconflict/ext-searchbox';
import SurveyCreatorTheme from 'survey-creator-core/themes';
import { creatorTheme } from '../styles/form-builder-theme';
import { createPdfAction } from '../utils/surveyPdf';

registerCreatorTheme(SurveyCreatorTheme);

function addCustomTheme(theme: ICreatorTheme, userFriendlyThemeName: string) {
  const enLocale = getLocaleStrings('en');
  const themeName = theme.themeName || 'customTheme';
  (enLocale.creatortheme.names as Record<string, string>)[themeName] = userFriendlyThemeName;
  registerCreatorTheme(theme);
}

addCustomTheme(creatorTheme, 'Custom Theme');

const defaultCreatorOptions: ICreatorOptions = {
  showTranslationTab: true,
  showThemeTab: true,
  autoSaveEnabled: true
};

export default function FormBuilderComponent(props: {
  onSaveSurvey: (json: object) => void;
  json?: object;
  options?: ICreatorOptions;
}) {
  const creatorRef = useRef<SurveyCreator | null>(null);

  if (!creatorRef.current) {
    const creator = new SurveyCreator(props.options || defaultCreatorOptions);

    creator.saveSurveyFunc = (
      no: number,
      callback: (no: number, success: boolean) => void
    ) => {
      props.onSaveSurvey(creator.JSON);
      callback(no, true);
    };

    creator.applyCreatorTheme(creatorTheme);

    createPdfAction(creator);

    creatorRef.current = creator;
  }

  const creator = creatorRef.current;

  useEffect(() => {
    if (props.json) {
      creator.JSON = props.json;
    }
  }, [props.json, creator]);

  return (
    <div style={{ height: '100%', width: '100%' }}>
      <SurveyCreatorComponent creator={creator} />
    </div>
  );
}
Step 7: Run Your Application
Now that we've set up all the components, let's run the application:
npm run dev
Visit http://localhost:3000 to see your SurveyJS form builder in action!
Source Code
You can find the source code for this tutorial on GitHub:
A complete demo that includes the Form Library, Form Builder, PDF Generator, and Dashboard is available here:
SurveyJS + Next.js Quickstart Template
Extend Your Form Builder
You can extend the form builder further as follows:
- Add database integration: Replace
localStoragewith a proper database. - Implement user authentication: Add user accounts and survey ownership.
- Create custom question types: Develop specialized form elements.
- Add collaboration features: Allow multiple users to edit surveys.
- Implement survey sharing: Generate shareable links for surveys.
- Add survey analytics: Visualize user responses using a dashboard or table.
For more information on how to build a complete form management system, refer to the following help topic:
Integrate SurveyJS Libraries with Backend
Conclusion
You've successfully created a sample form management system using SurveyJS Creator and Next.js. This implementation demonstrates the core capabilities of SurveyJS Creator as a self-hosted form builder solution, including survey persistence, custom theming, and PDF export functionality. For more advanced features and customization options, be sure to explore the SurveyJS documentation.