How to Create a Quiz or Assessment Test
About Quizzes and Assessment Tests
Quizzes and assessment tests are a great way to engage your students and test their knowledge on a particular topic. With SurveyJS, you can create multiple online quizzes and assessment forms, add timing and scoring to them, customize their look, and provide immediate and personalized feedback to each respondent on the "Thank you" page. This guide will walk you through the process of creating a sample quiz.
Available Question Types for Quizzes
In SurveyJS, you can use any question type in your quizzes or tests. This includes simple types like Radio Button Group and Checkboxes, as well as more complex types, such as Multiple Textboxes and matrices that accept multiple answers.
How to Assign a Correct Answer
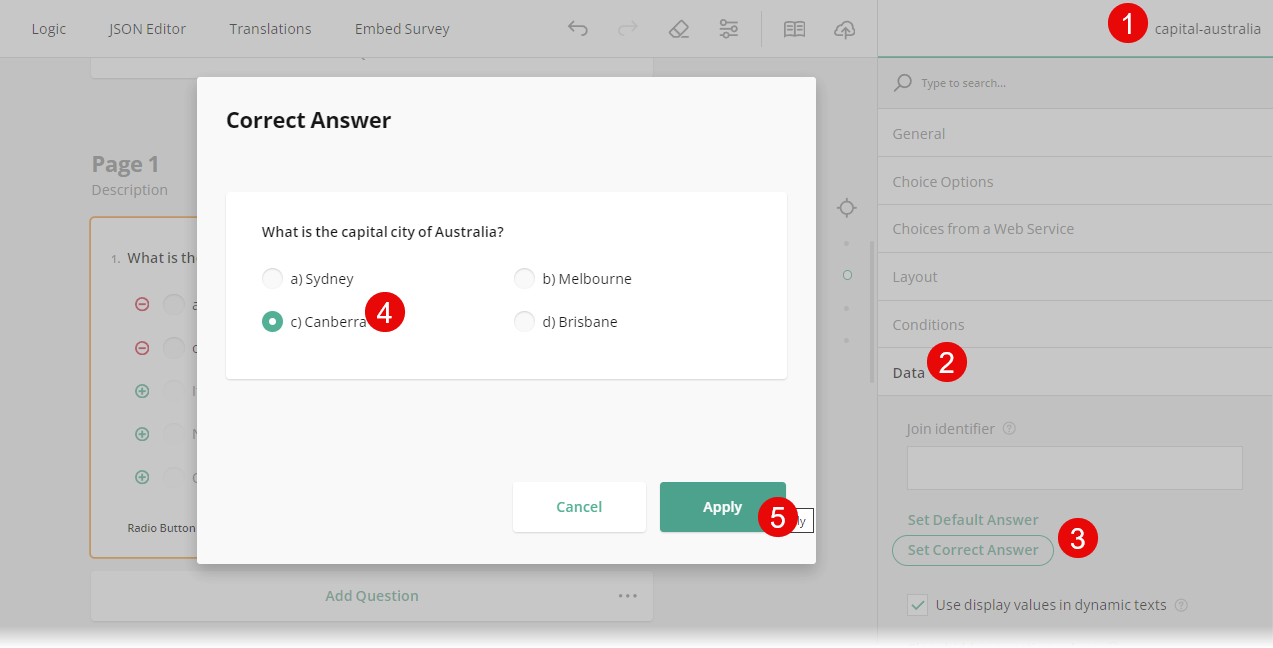
To assign a correct answer to a question, follow these steps:
Choose the question for which you want to assign a correct answer.
Under the Data category, find the Set Correct Answer property and click it to open a popup with the question and its options.
In the popup, assign the correct answer(s) and click Apply.
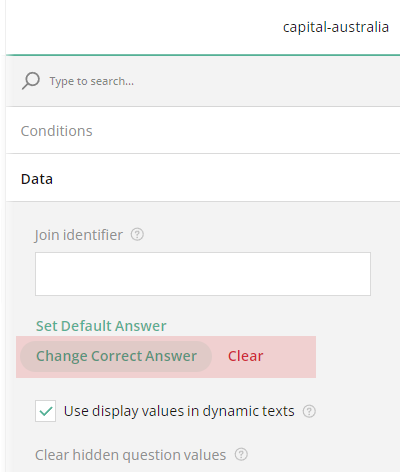
Once set, you can change the answer if needed, using the Change Correct Answer button.
If you want to remove the assigned answer, click Clear.
How to Configure Quiz or Test Settings
To create a quiz or assessment test, follow the steps below:
In the top-right corner of the survey editor, switch to survey-level settings.
Under the Quiz Mode category, locate the Time limit to complete the survey setting and specify its value in seconds. This defines the time after which the survey automatically moves to the "Thank You" page.
If you want to limit the time per page, assign a value to the Time limit to complete one page property. This hides the "Previous" navigation button and advances automatically to the next page once time runs out.
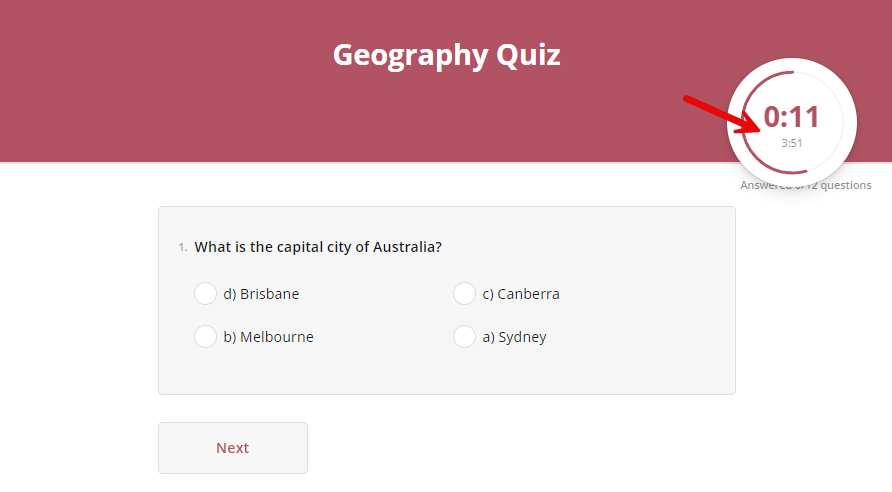
The Timer alignment property lets you control the position of the timer. Set it to Top (default) or Bottom based on your preference and layout requirements. The Hidden value disables the timer.
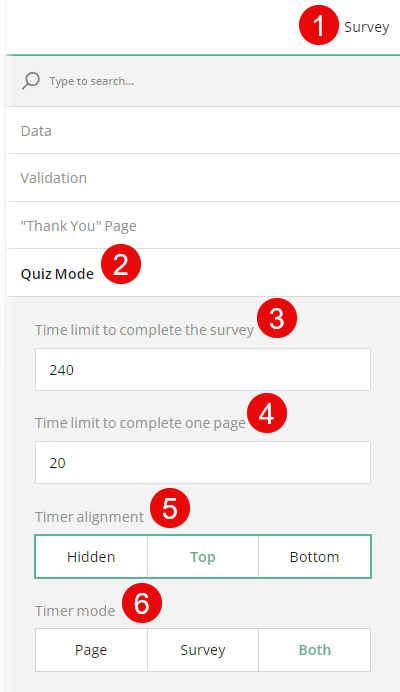
Use the Timer mode property to decide if the timer will display the time limit set for the entire survey, for individual pages, or both.
How to Add a Start Page
A Start Page in a quiz is useful for providing instructions, gathering respondent details, and keeping the timer off until the actual quiz begins.

To add a Start Page to your quiz or test, follow these steps:
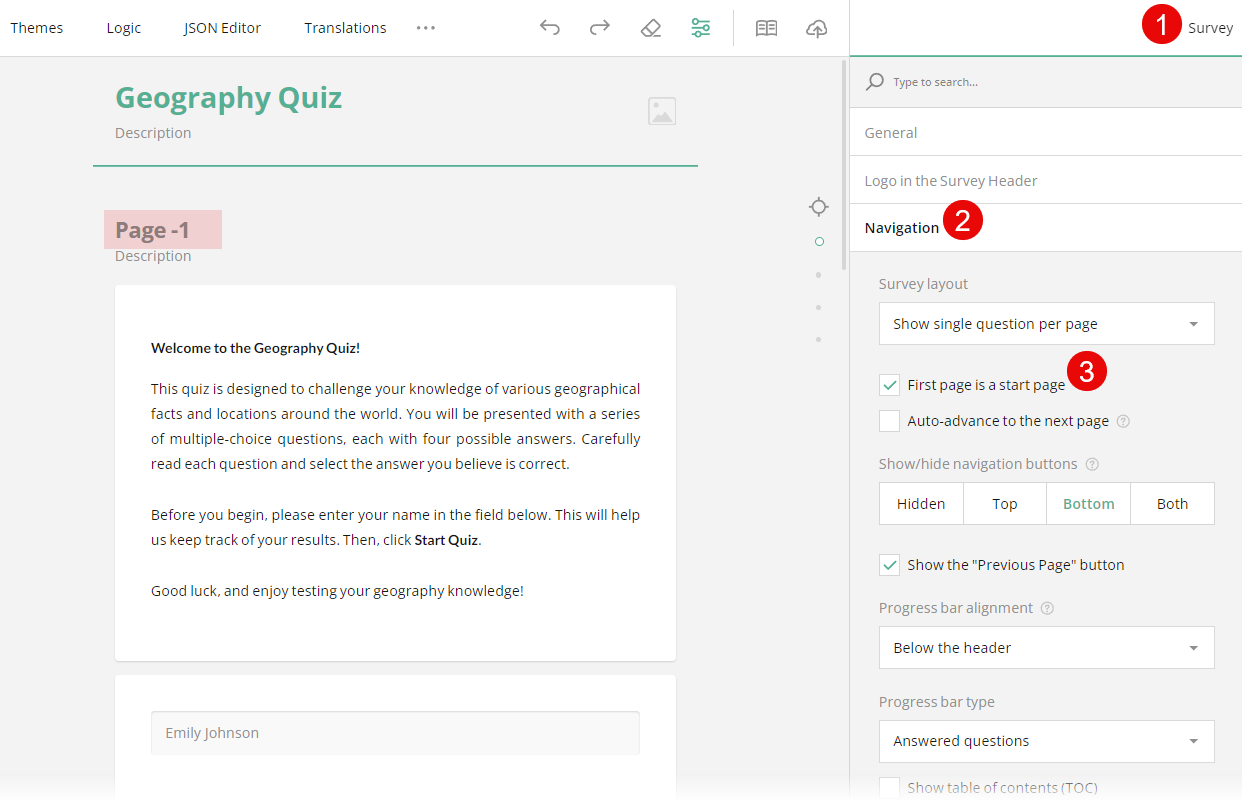
On the first page, add introductory text or instructions (using the HTML question type). You can also ask respondents to provide information, such as their name using a Single-Line Input question.
Switch to the survey-level settings in the top right corner of the editor and under the Navigation category, enable the First page is the start page property. This will make the first page function as a non-graded introduction.
How to Show the Number of Correct Answers
SurveyJS allows you to provide immediate feedback to your respondent by showing the number of correct answers on the "Thank You" page. To create dynamic content for your "Thank you" pages, you can use the following variables:
{correctAnswers}– Displays the number of correct answers selected.{questionCount}– Displays the total number of questions with an assigned correct answer.
To display the number of correct answers the "Thank You" page, do the following:
- Switch to survey-level settings and find the "Thank You" page category.
- In the "Thank You" page markup field, enter the following sample value:
'<h4>You got <b>{correctAnswers}</b> out of <b>{questionCount}</b> correct answers.</h4>'
This will display the number of correct answers out of the total.
How to Create Dynamic Feedback on the "Thank You" Page Using HTML Markup
You can provide more detailed feedback based on specific conditions. For example, you can show different messages when all answers are correct or none are correct. To do this:
- Go to the Dynamic "Thank You" page markup property under the "Thank You" page category.
- Click the Plus icon to add a new version for the "Thank you" page.
- Set conditions and HTML markup:
- For no correct answers, enter
{correctAnswers} == 0in the Expression field and set the HTML markup field to:
'<h4>Unfortunately, none of your answers is correct. Please try again.</h4>' - For all correct answers, enter
{correctAnswers} == {questionCount}in the Expression field and set the HTML markup field to:
'<h4>Congratulations! You answered all the questions correctly!</h4>'
- For no correct answers, enter
- Optionally, click the Plus icon to add more conditions and custom responses as needed.
How to Create Custom Conditions for Dynamic "Thank You" Pages
SurveyJS allows you to create an unlimited number of custom "Thank You" pages. To create custom conditions:
Follow the first two steps to add a dynamic "Thank You" page.
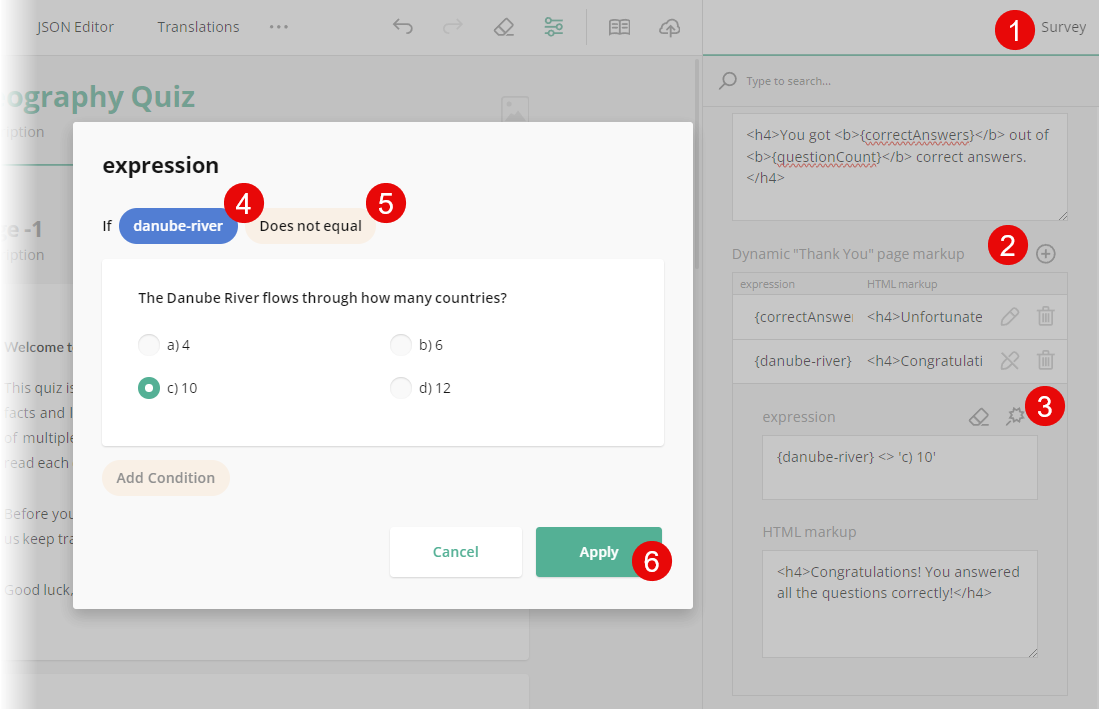
Instead of manually entering an expression, click the Magic wand icon to open a condition builder.
In the popup, define a condition that triggers a specific "Thank You" page version when met.
Once a condition is set, click Apply to save your changes.
If you are unfamiliar with HTML and markup customization, refer to the W3Schools's HTML Introduction Guide for basic information.
By following the steps above, you can create quizzes or assessment tests that include dynamic "Thank You" pages with immediate feedback on the number of correct answers, a customizable Start page, and configurable timing options that make respondents adjust their pace.
SurveyJS also supports scoring features. However, its configuration requires the involvement of a developer. Refer to Scored Survey demo to learn how to add scoring to your survey.
Send feedback to the SurveyJS team
Need help? Visit our support page